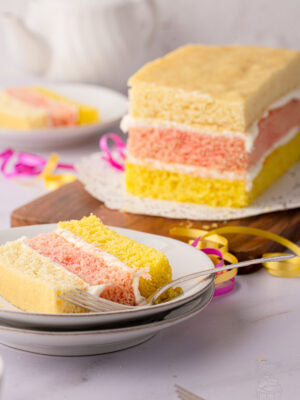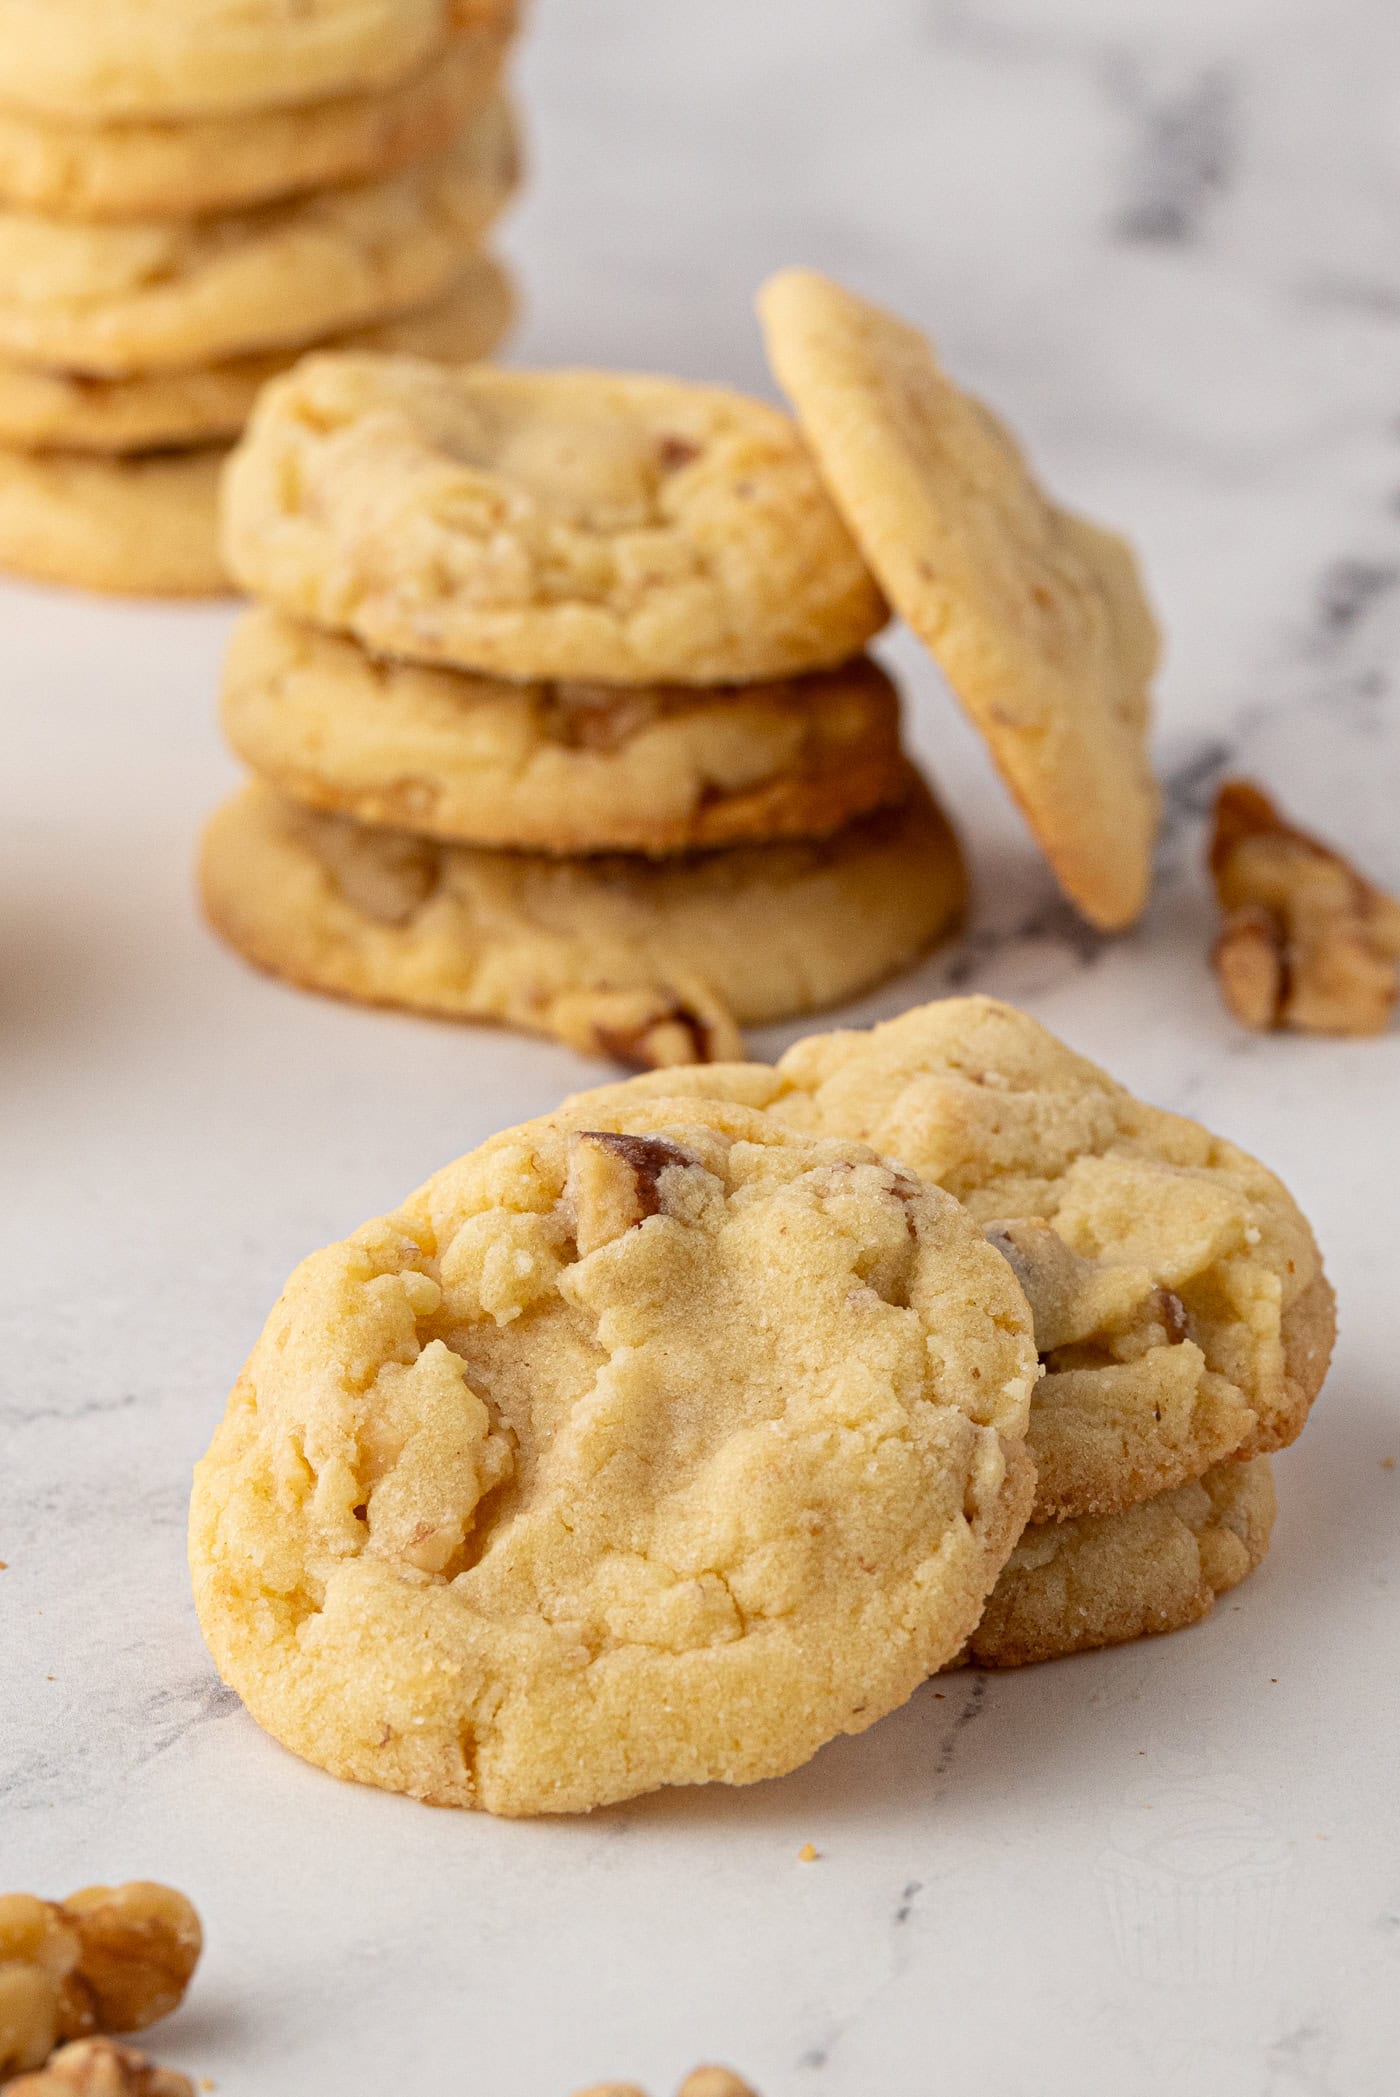
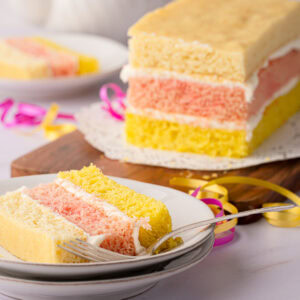
Some cakes just look like childhood, and this Angel Cake recipe is one of them. With its pink, yellow and plain vanilla sponge layers sandwiched together with buttercream, it’s a proper nostalgic British bake – and in our family, it will always be “Papa’s cake” after my Mum made one for his 40th birthday and he refused to share it!
I’ve been making this version for over a decade, and despite those neat, colourful layers, it’s ready in under an hour, and you only need one tin, thanks to my simple greaseproof-paper divider trick.
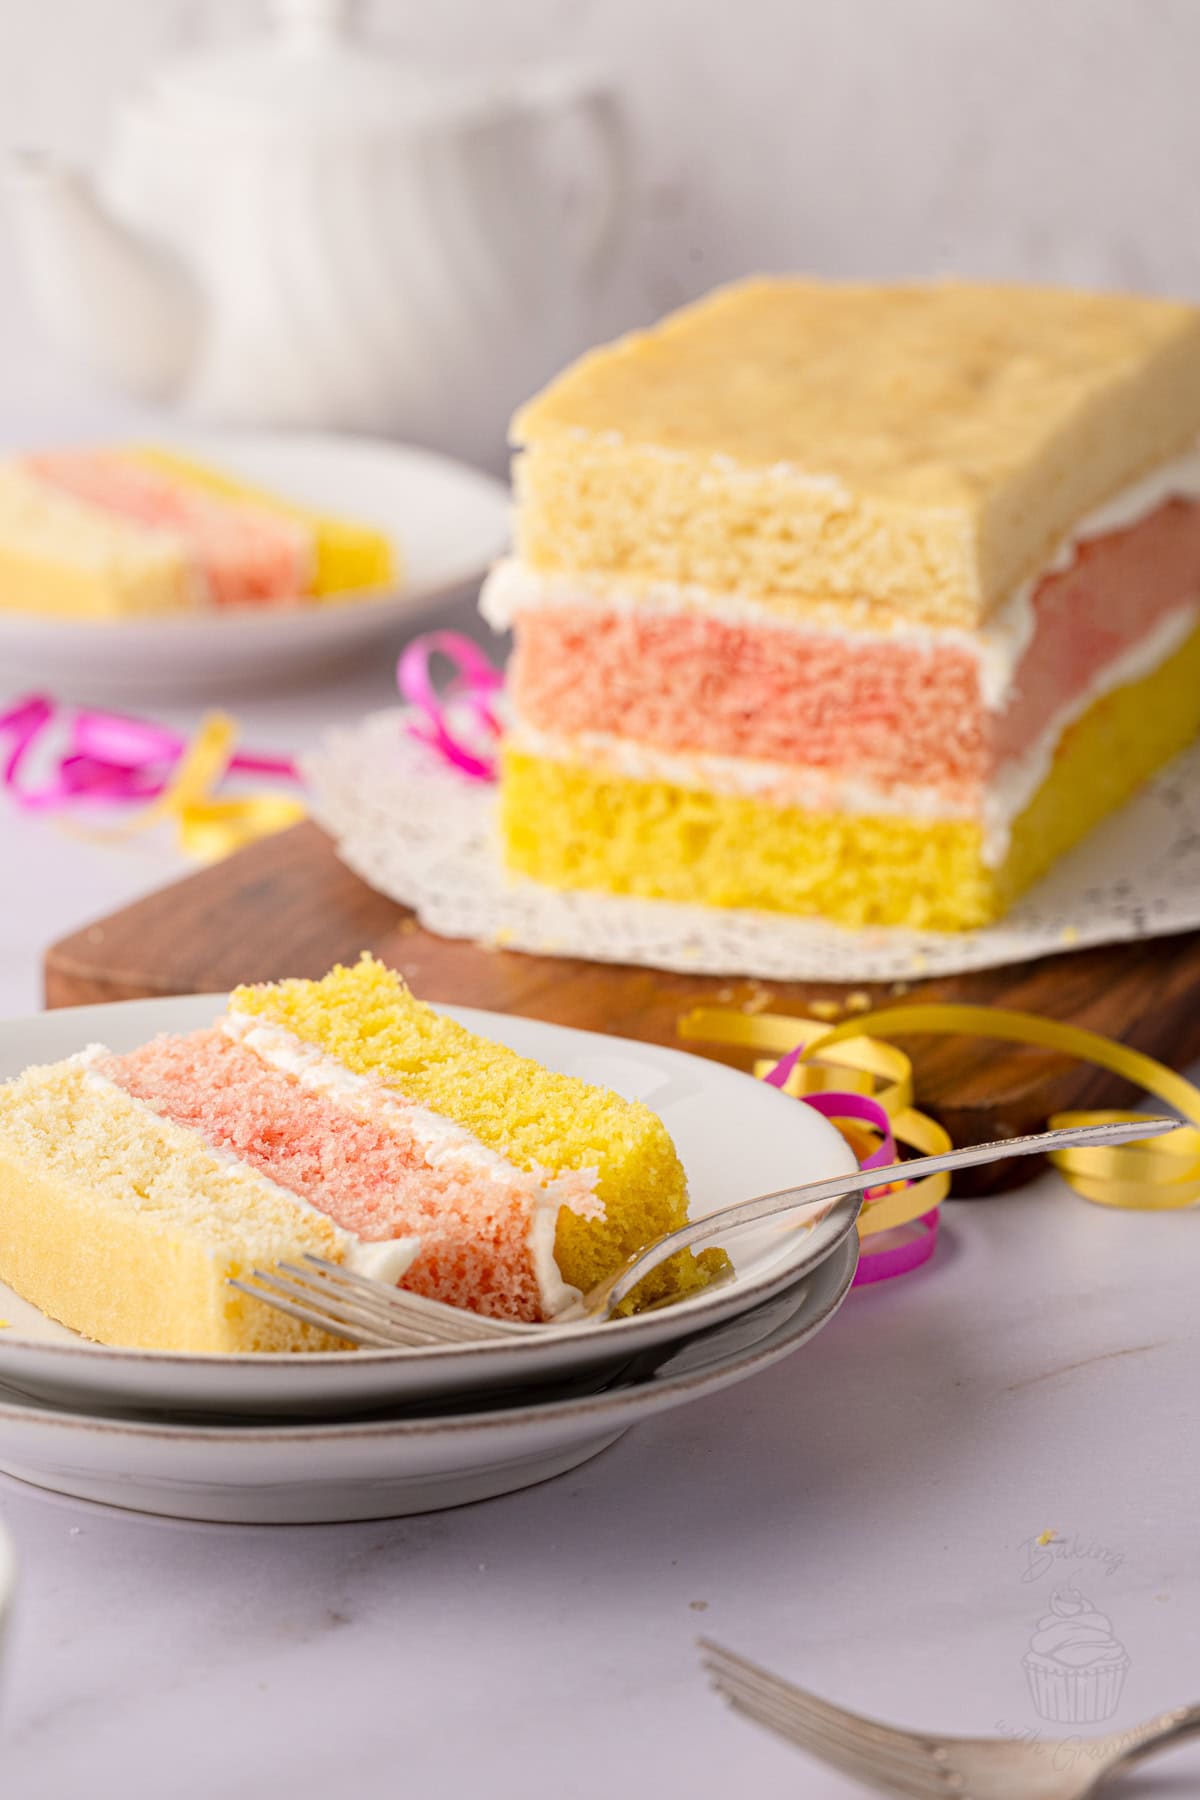
Angel Cake Recipe Snapshot
- Difficulty: Easy, but it can be a little bit fiddly sectioning your tin – how-to instructions are below, though!
- Prep Time: 30 minutes.
- Bake Time: 20-25 minutes.
- Total Time: 55 minutes.
- Serves: 8 slices.
- Key Ingredients: Margarine (or butter), self-raising flour, caster sugar, eggs & food colouring.
- Dietary Info: Nut-free, with substitutions for gluten-free, egg-free, dairy-free and vegan included below.
- Texture: Soft, fluffy sponge with smooth buttercream.
- What to Expect: Three light vanilla sponges in pink, yellow and plain, sandwiched with sweet vanilla buttercream.
Summarise & Save this Recipe on:
What is British Angel Cake?
If you’re in the UK, you’ve probably spotted Angel Cake in the supermarket bakery aisle before, beside other favourites like my Battenberg Cake recipe, soft Gingerbread Loaf and easy Swiss Roll. With its three colourful layers of vanilla sponge and buttercream filling, Angel Cake is a bit of a British classic.
Despite the name, British Angel Cake is completely different from American Angel Food Cake. British Angel Cake is a three-layer sponge cake made with pink, yellow and plain vanilla sponge, sandwiched with buttercream and sometimes finished with white icing and pink decoration. Unlike American Angel Food Cake, it is made from a traditional cake batter rather than a fat-free whipped egg-white sponge.
Homemade Angel Cake is lovely and light, soft and full of vanilla flavour, with just the right amount of buttercream between each colourful layer. Even if my kids do say it’s somewhat boring 🤨 How can a colourful cake ever be boring!?
The Angel Cake That Started it All
If you grew up in the UK, there’s a good chance you’ve had a slice of Angel Cake at some point in your life. With its three colourful layers of vanilla sponge and a sweet buttercream filling, it’s one of those cakes that instantly brings back memories of birthday parties, family gatherings and the supermarket bakery aisle. For me though, Angel Cake always reminds me of one birthday in particular.
When my Dad turned 40, my Mum decided she was going to bake him an Angel Cake. It wasn’t a recipe she’d made before, but Papa had mentioned how much he loved the one from the supermarket, so she thought she’d surprise him with a homemade version instead. Well… safe to say he loved it!
In fact, he loved it so much that he refused to share it with anyone else. Despite having family over to celebrate his birthday, this cake was very quickly claimed as his, and only his. It became a bit of a family joke, and ever since then, Angel Cake has always been “Papa’s cake.”
Looking back now, it would have made the perfect birthday cake alongside a few other classic party bakes, like my easy Cheese Breadsticks, Marshmallow Top Hats and Butterfly Fairy Cakes.
I’ve been making this particular recipe for over a decade now, and it’s one I always find myself choosing whenever I want something that looks a little bit special but without being overly complicated. It may well look impressive with its three colourful sponge layers, but it’s actually much easier to make than you might think – especially with my little baking paper trick for creating all three layers in a single tin – no special equipment required, and the same idea behind my Battenberg Cake recipe, too.
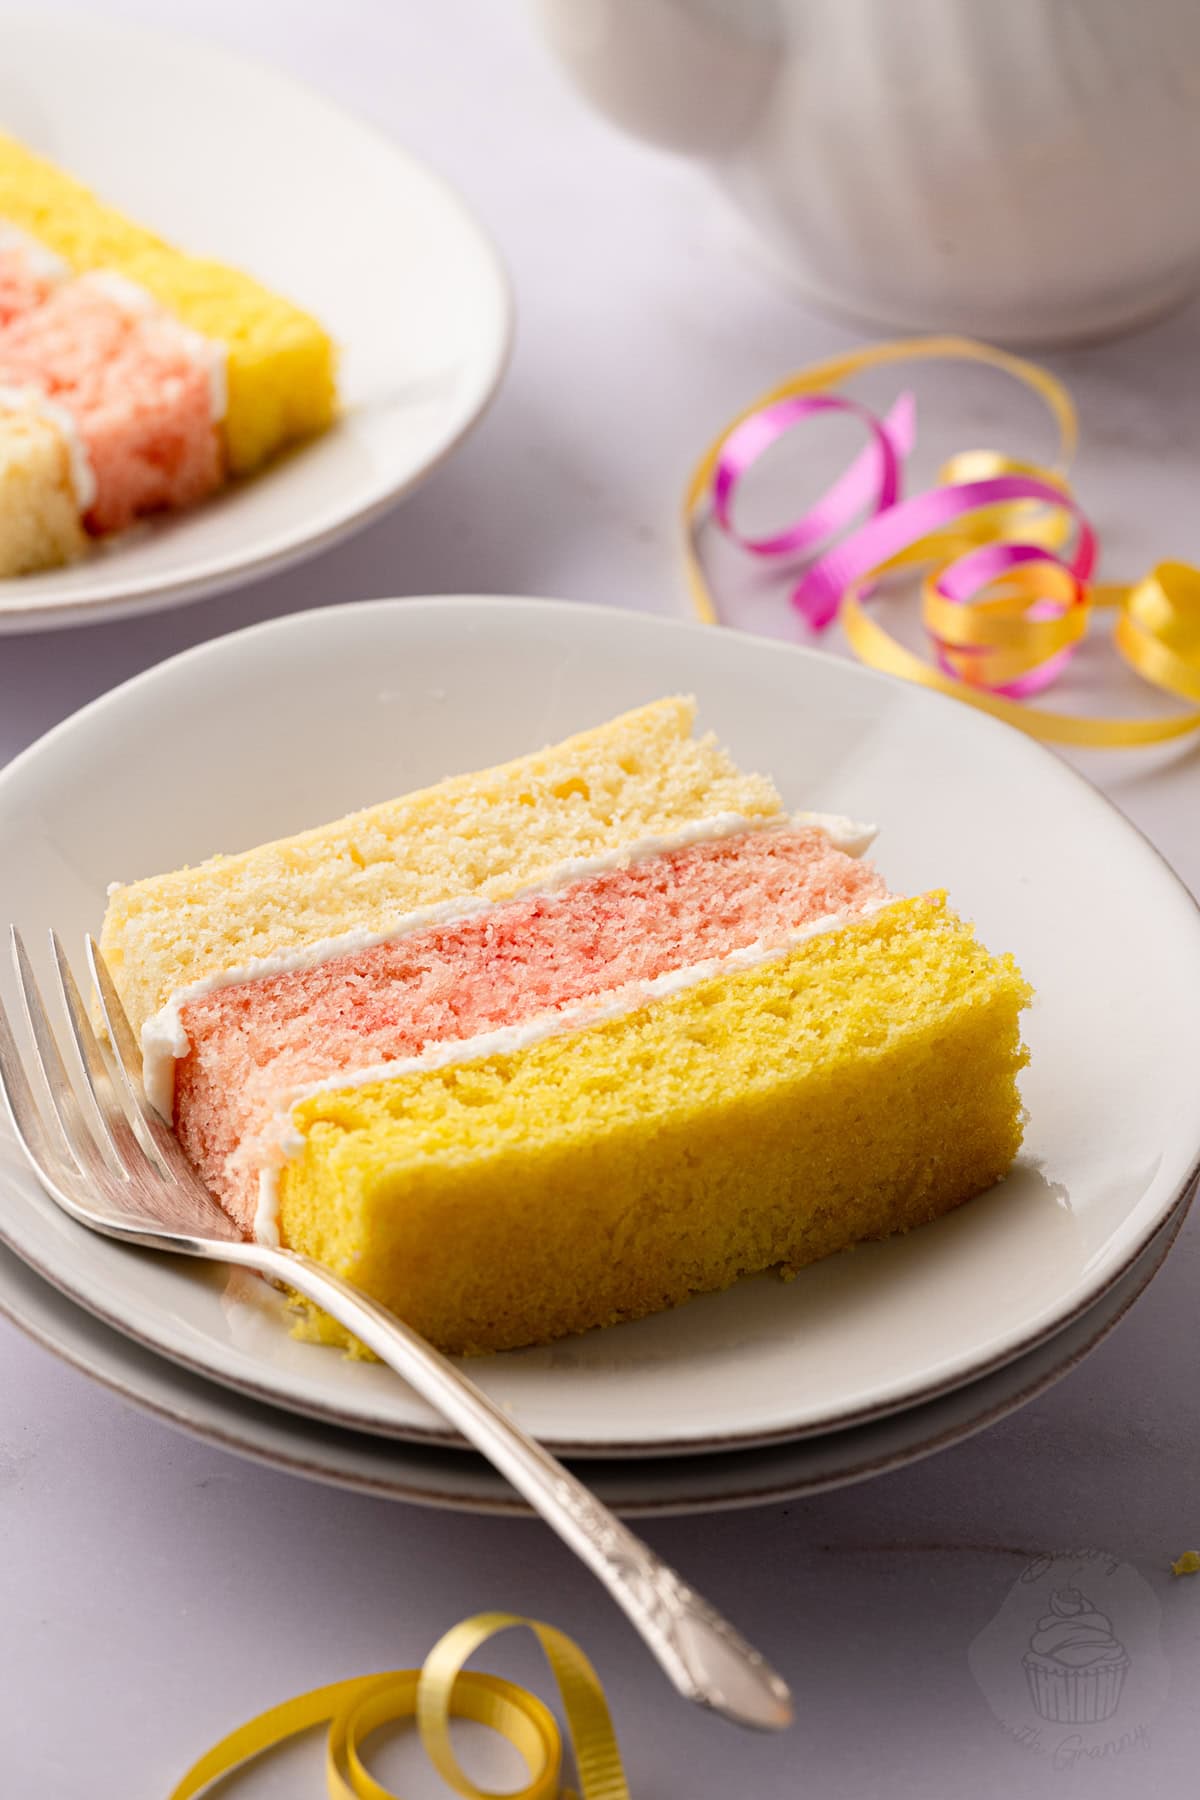
Key Ingredients
Want to know more about the different types of sugar used in baking? My Bakers’ Caster Sugar Ingredient Guide explains when to use caster sugar, suitable substitutes and US equivalents.
Not sure which margarine to choose? My Bakers’ Margarine Ingredient Guide explains the different types, when to use them and what difference it can make to your baking.
See the recipe card for a full ingredients list, required quantities and cup conversions.
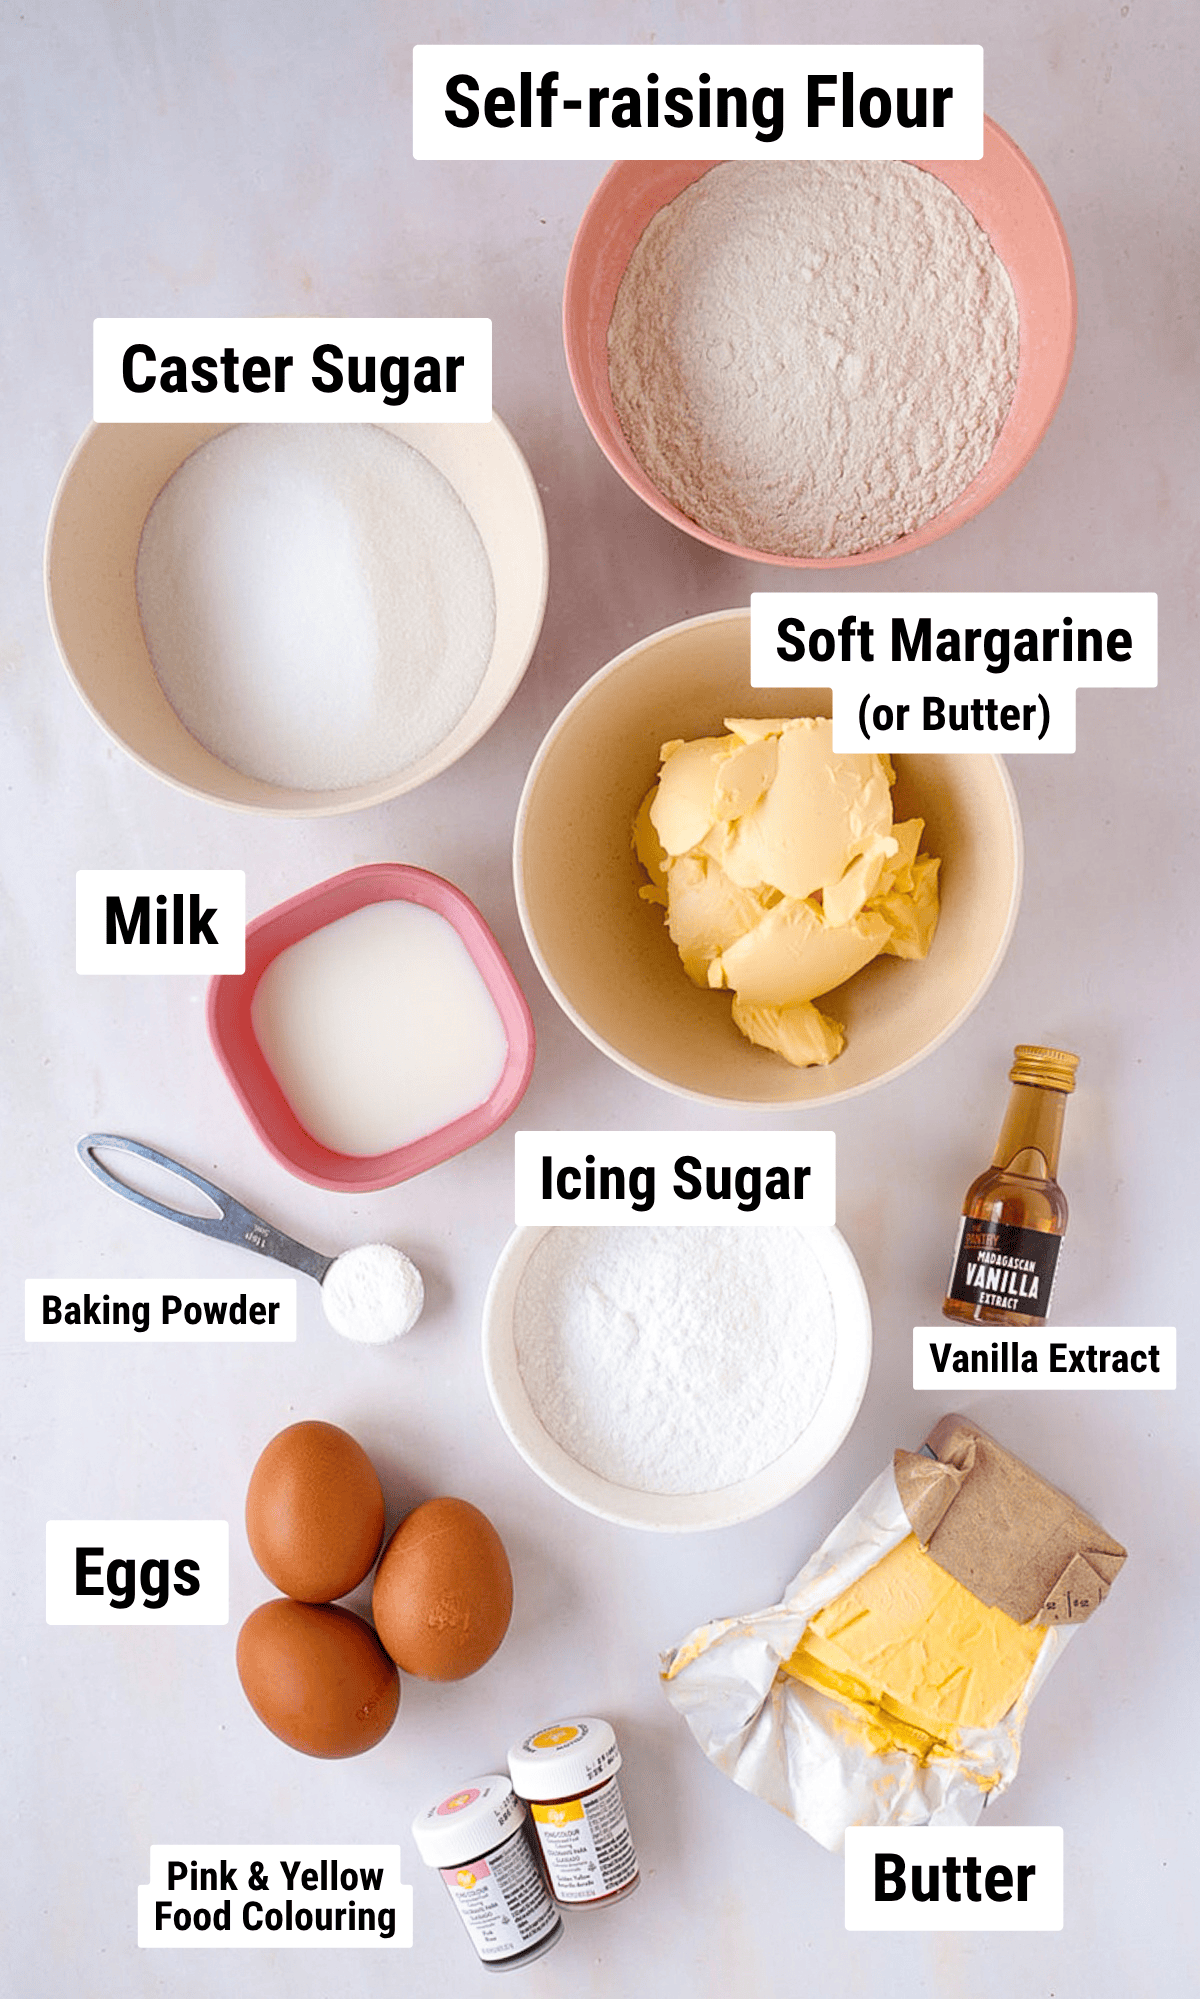
Substitutions & Additions
Vanilla Extract: Vanilla bean paste can be used in place of vanilla extract if you’d like a slightly richer vanilla flavour. Vanilla essence will also work if that’s all you have in the cupboard, or you can simply leave the cake and buttercream plain.
Free-from & Vegan
Gluten-free Options:
To make this Angel Cake gluten-free, you should be able to swap the self-raising flour for a good-quality gluten-free self-raising flour. The sponge may have a slightly different texture, but it should still bake into lovely colourful layers. If you do adapt the recipe to be gluten-free, please let me know how you get on by leaving a comment below!
Nut-free Adjustments:
This recipe contains no nuts, but as always, be sure to double-check the allergen lists for your individual ingredients.
Dairy-free Swaps:
To make this Angel Cake dairy-free, simply use a dairy-free soft margarine in the sponge and a dairy-free block margarine or butter alternative for the buttercream.
Egg-Free Adaptions:
I haven’t yet tested this recipe egg-free, but with most sponge cake recipes, it should work just fine with a vegan egg replacer, such as Oggs or Bob’s Red Mill Egg Replacer.
Vegan Substitutions:
To make this a vegan Angel Cake, simply follow both the dairy-free and egg-free suggestions above. I haven’t yet tested a fully vegan version of this recipe, but if you do, I’d love to hear how you get on by leaving a comment below!
Allergy Disclaimer & Resources:
Any advice or suggestions to make recipes “free-from” or vegan are purely suggestions. Please double-check all packaged ingredients individually, taking extra caution when baking for those with allergies or intolerances.
For official guidance on food allergies, please see Food Standards Agency (food.gov.uk) | For more info on coeliac disease, please see Coeliac UK (coeliac.org.uk) | For more info on a vegan diet, please see The Vegan Society (vegansociety.com)
How to Divide One Tin into 3 Sections for Angel Cake
One of the things that puts people off making Angel Cake is that they think they’ll need three separate cake tins. Thankfully, you don’t! I use a 30×23cm (12×9 inch) baking tin, along with one large sheet of greaseproof paper, to divide the tin into three sections for each coloured sponge mixture. It can be a little fiddly at first, but once you’ve mastered it, you’ll see it’s actually quite easy.
And don’t worry if the paper dividers aren’t perfectly straight. They simply need to keep the coloured batters separate while they bake, and you can trim them to be more uniform when baked. Once the cakes are stacked together with buttercream, nobody will ever know if they were a little wonky!
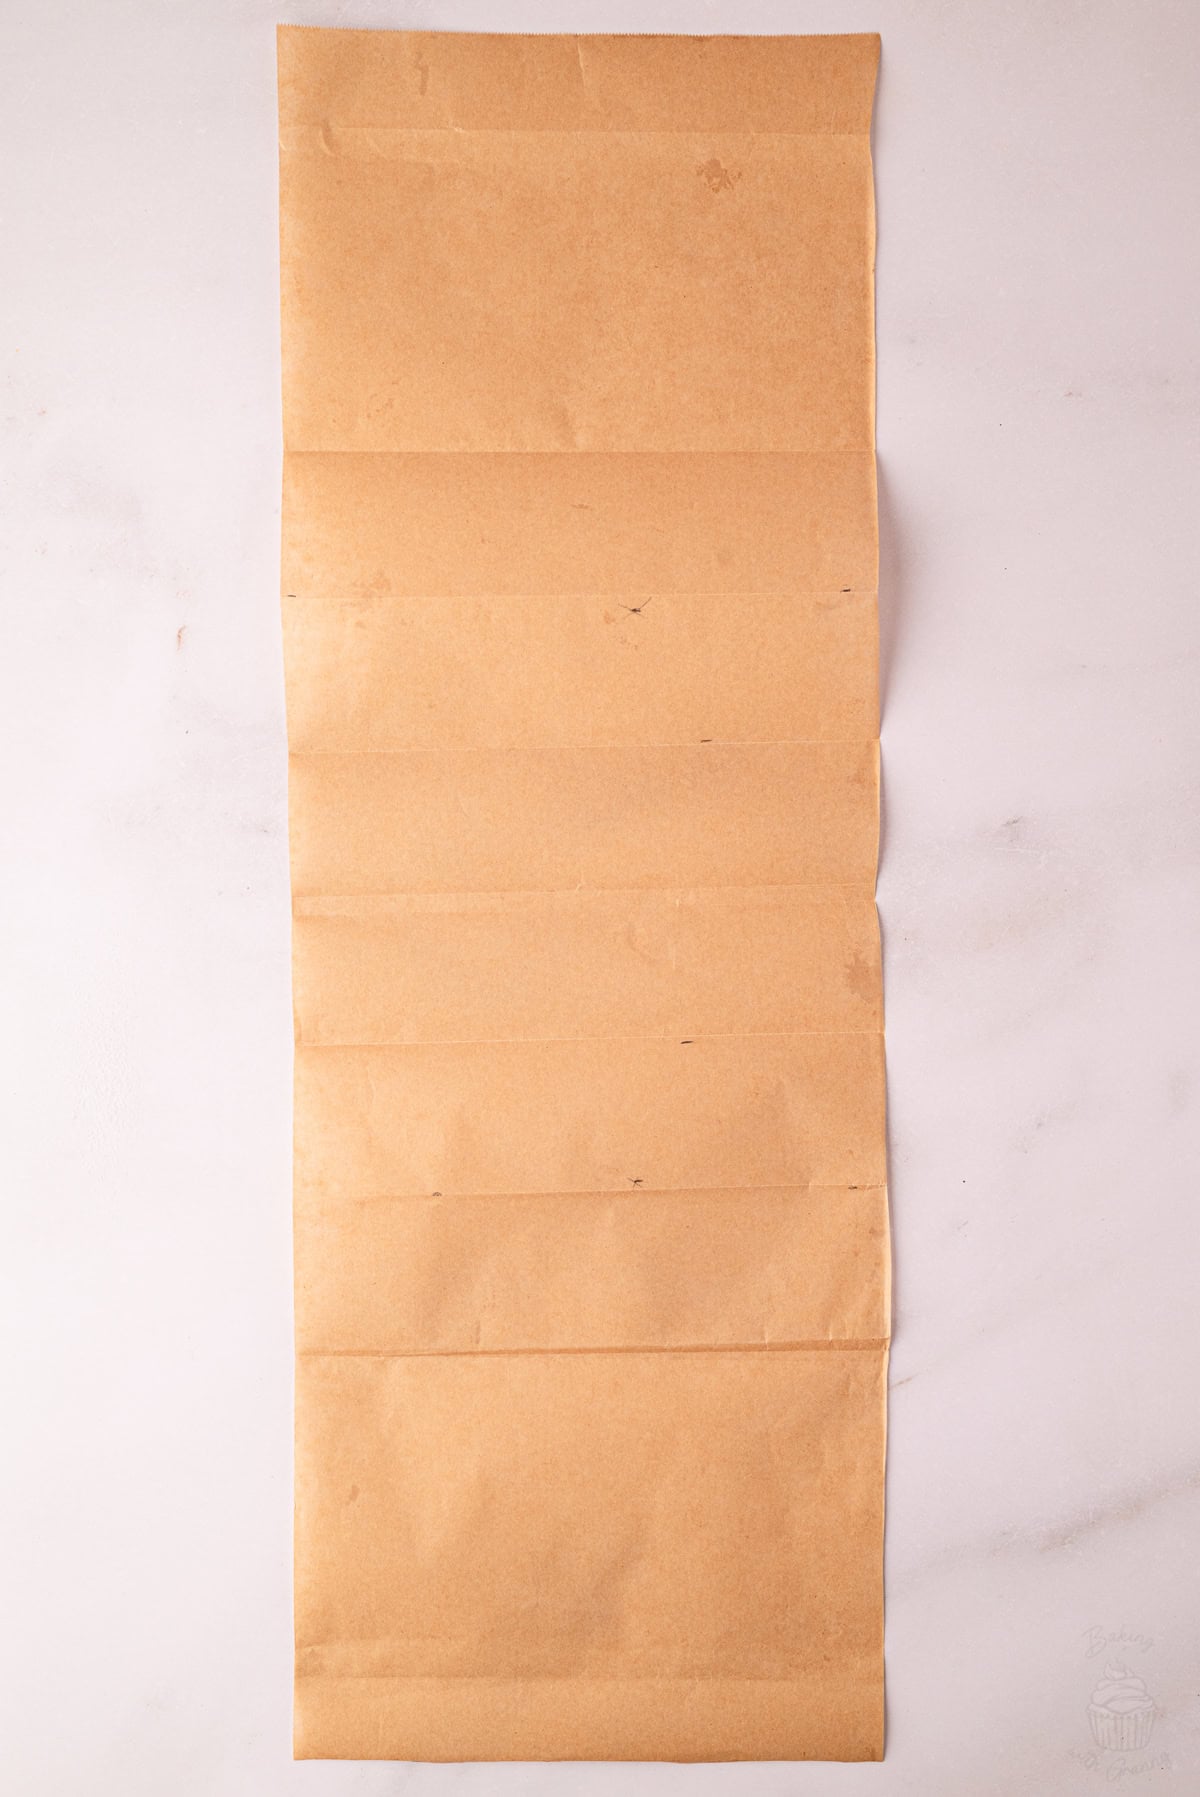
- Cut a piece of greaseproof paper measuring approximately 60×23cm (24×9 inches).
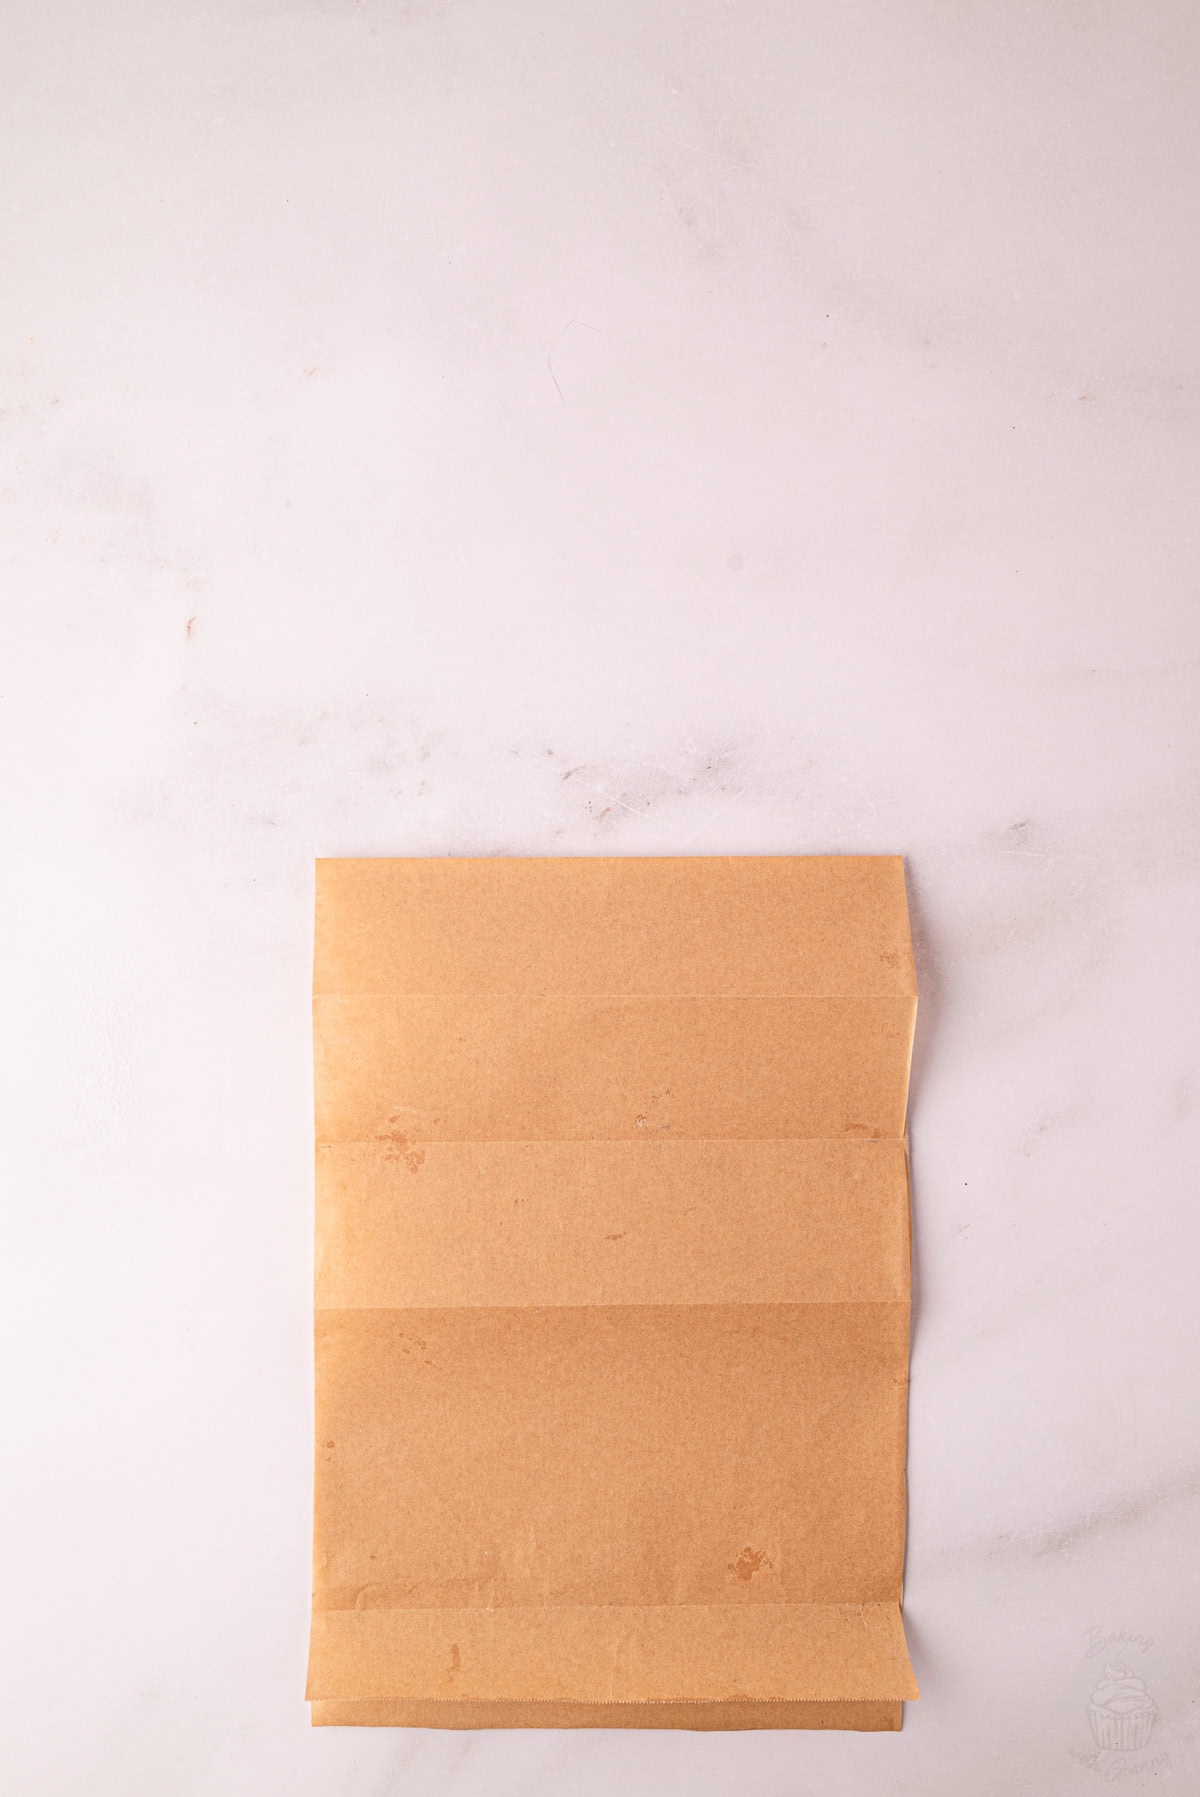
- Fold the paper in half lengthways, then measure 5cm (2 inches) out from the centre fold on each side and make another fold. These two folds will create the centre section for your plain sponge.
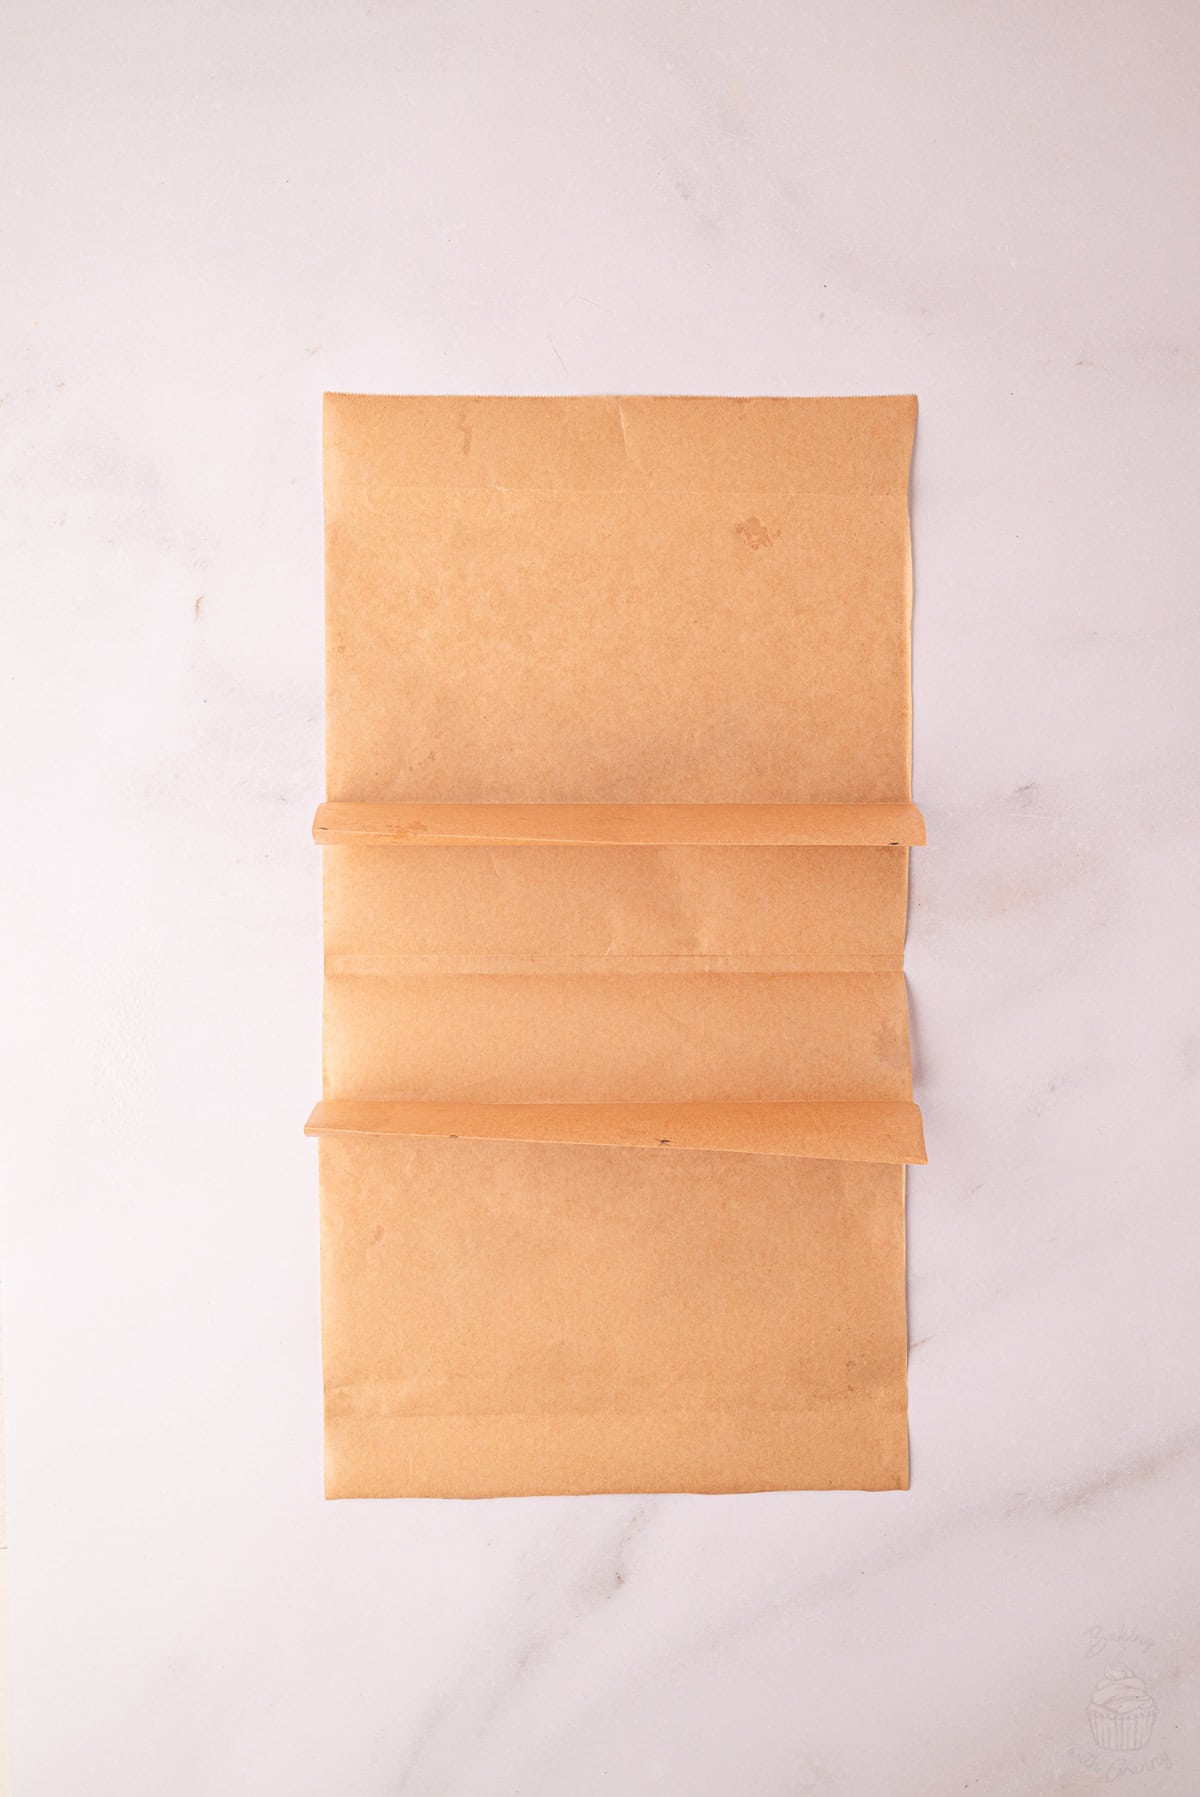
- Open the paper back out, then create a pleat along each outer fold line. The pleats should be roughly the depth of your baking tin so they’ll stand upright and keep each coloured sponge separate while baking.
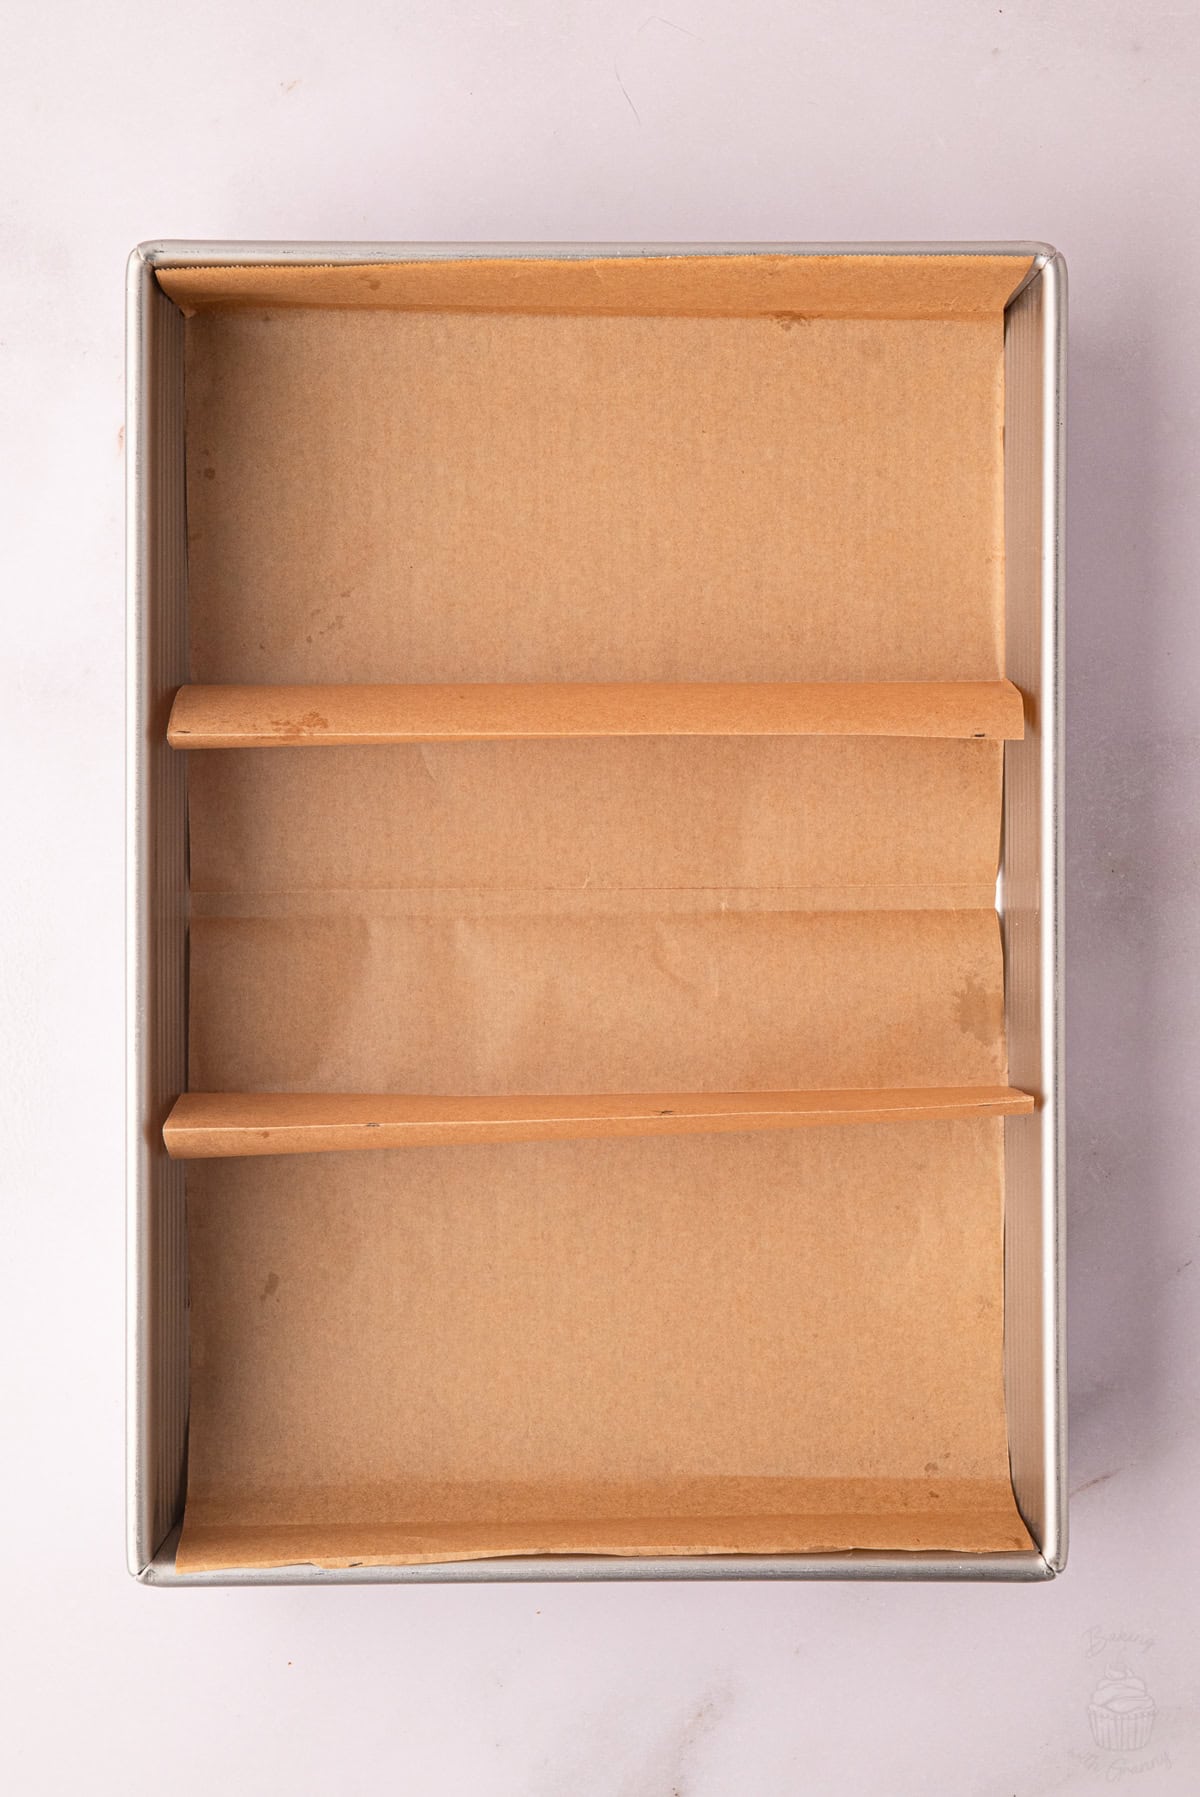
- Place the folded greaseproof paper into your lined 30×23cm (12×9 inch) baking tin, then fold the excess paper up against the sides of the tin to help keep everything in place.
How to Make Angel Cake Slices
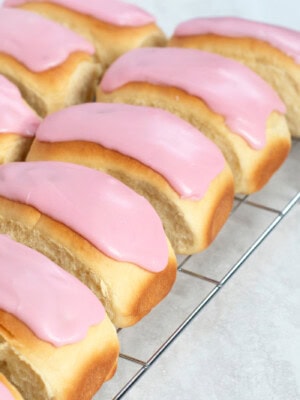
Although I like to leave my Angel Cake as it is, you may be more familiar with the individual Angel Cake slices you often see in the shops, finished with white icing and a little pink squiggle on top.
If you’d like to recreate that look at home, simply top the finished cake with a thick water icing. Mix icing sugar (powdered sugar) with a little hot water, adding it a little at a time until you have a thick but spreadable consistency – then spread it over the top of the cake. Keep back a little of the icing, then colour it with pink food colouring, and pipe or drizzle it over the top in a squiggle.
Then just leave the icing to set before cutting the cake into individual rectangular slices to serve.
Top Tips for Angel Cake
- Weigh Your Batter for Even Layers: If you want your three sponge layers to be as even as possible, use a digital scale when dividing the batter between the three bowls, rather than relying entirely on guesswork.
- Don’t Worry About Perfect Dividers: Your greaseproof paper doesn’t need to be folded with millimetre precision. As long as it creates three separate sections and keeps the batters apart while baking, you can neaten the sponges once they’re cool.
- Use White Caster Sugar for the Best Colours: Regular white caster sugar will give you the cleanest, brightest pink and yellow sponge colours. Golden caster sugar will still make a delicious cake, but its darker colour can make the coloured sponges look a little duller.
- Don’t Over-mix the Batter: Once you add the self-raising flour, mix only until everything is combined and no dry flour specks remain. Over-mixing at this stage can make your sponge a bit dense, instead of light and fluffy.
- Cool Before Trimming & Assembling: Let all three sponges cool completely before levelling the tops off or adding the buttercream. Warm sponges can be too soft to trim and can also cause the buttercream to melt.
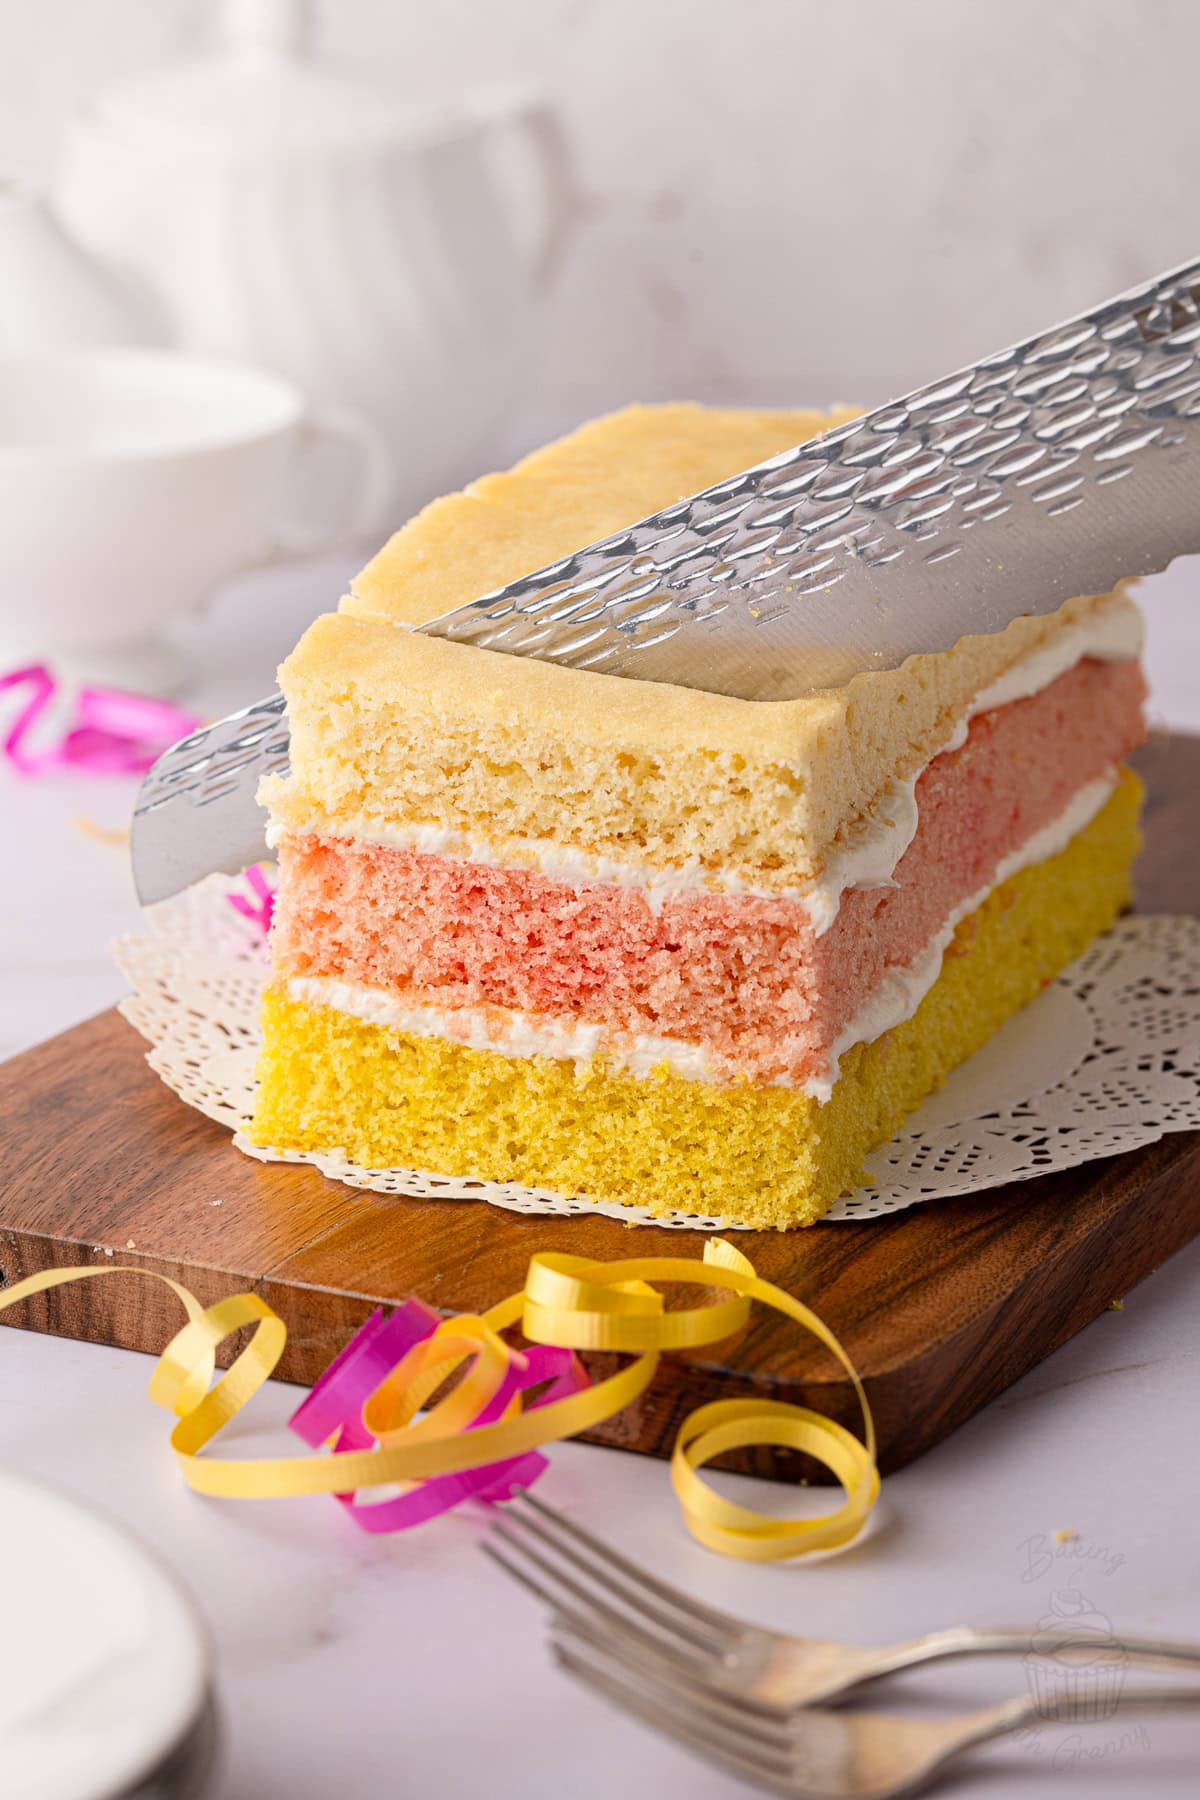
- Use a Serrated Knife for Neat Slices: Once assembled, a sharp serrated knife will cut through the soft sponge without overly squashing the colourful layers together.
Storage & Freezing
- Storage: Store your Angel Cake in an airtight container at room temperature for up to 3-5 days. If your kitchen is particularly warm, you can keep it in the fridge, but allow it to come back to room temperature before serving so the sponge and buttercream can soften again.
- Freezing: Angel Cake freezes well for up to 3 months. For the best results, wrap the whole cake (or individual slices) well before freezing. Defrost overnight in the fridge or for a few hours at room temperature before serving.
With thanks to Naomi Seiler for creating these photos.
Angel Cake FAQs
No. Despite them having similar names, they’re completely different cakes. British Angel Cake is made with a traditional vanilla sponge, with one coloured pink, one yellow, and one left plain, before being layered together with buttercream. American Angel Food Cake is made primarily with whipped egg whites and has a much lighter, airy texture.
I use a 30×23cm (12×9-inch) baking tin with greaseproof paper dividers to create the three sponge layers. But if you’d prefer, you can bake the layers in an adjustable multiway cake tin, or in three separate loaf tins. Just keep an eye on the baking time, as it may vary slightly.
Yes, you can make this Angel Cake as a round layer cake. A few readers have successfully adapted the recipe this way, although I haven’t personally tested it in round tins. Rather than dividing one rectangular tin into three sections, divide the batter between three round cake tins, colouring one pink, one yellow and leaving one plain – I would suggest small tins such as three round 15cm (6 inches) sandwich tins. And keep an eye on the cakes as they bake, as the baking time may differ depending on the size and depth of your tins.
Don’t worry – it happens sometimes. Even if one layer rises slightly more than the others, you can simply trim them before assembling the layers. Once they’re sandwiched together with buttercream, nobody will ever know!
Definitely! Children usually love mixing the colourful batters and watching the three different sponge layers come together. Younger children will just need a little help with the oven and assembling the finished cake layers. Other great recipes for baking with kids include my Chocolate Marshmallow Top Hats, Rainbow Cookie recipe and easy Rock Cakes.
More Classic British Cakes
If you loved this traditional Angel Cake, here are some more of my favourite British cake recipes for you to try next:

Save this recipe!
Want to save this recipe for later? Pop your email below and come back to it when you’re ready to bake.
Angel Cake
INGREDIENTS
For the Cake:
- 150 g Soft Margarine (or Butter) (at room temperature)
- 150 g Caster Sugar
- 3 Free-range Eggs (at room temperature; see Egg Size note below)
- ½ tsp Vanilla Extract
- 200 g Self-raising Flour (see Self-raising Flour note below)
- 1 tsp Baking Powder
- 1 tbsp Milk
- Pink & Yellow Food Colouring (gel food colouring preferred)
For the Buttercream:
- 50 g Block Margarine or Butter (softened)
- 110 g Icing Sugar
- Splash of Milk
EQUIPMENT
- Ruler or Measuring Tape
INSTRUCTIONS
For the Cake:
- Preheat your oven to 180°C (160°C for fan-assisted ovens, Gas Mark 4 or 350°F). Grease a 30×23cm (12×9 inches) baking tin with a little excess butter/margarine. Take a piece of greaseproof paper around 60×23cm (24×8 inches), fold it in half, measure 5cm in from the fold and create another fold at this point, then open the paper back up – these folds are where your middle sponge will be. Fold a pleat on either side of this middle section (a few centimetres high, around the depth of your tin). Place the greaseproof paper into your tin and fold the excess up the sides of your tin. Set aside.
- In a large bowl, cream the butter/margarine and sugar together until light and fluffy, in both colour and texture.
- Add the eggs one at a time, mixing until combined before adding the next. Don't worry if the mixture appears to curdle – this will remedy itself once the flour is added.
- Stir in the vanilla and milk. Sift in the flour and baking powder, and mix until you have a smooth batter and no dry flour specks remain.
- Evenly separate the batter into 3 bowls. Leave one bowl plain, and add a small amount of yellow and pink food colouring to the others. Mix until well combined – don't go too dark with food colouring, as the colour will intensify as it bakes.
- Spoon and spread the batter into the individual sections of your prepared cake tin. Bake in your preheated oven for 20-25 minutes, until risen and golden in colour, and a skewer inserted comes out clean.
- Remove from the oven and leave in the tin until cool enough to touch, then remove the cakes from the tin (using the greaseproof liner to help) and place on a wire cooling rack to cool completely.
- Once completely cool, prepare your buttercream.
For the Buttercream:
- In a bowl, cream the butter/margarine and icing sugar to create a buttercream, adding a little milk to loosen it up to a spreadable consistency if required.
- Trim the edges of the cakes so they are all an even rectangular shape, and trim the tops of the yellow and pink sponges so they have a level finish.
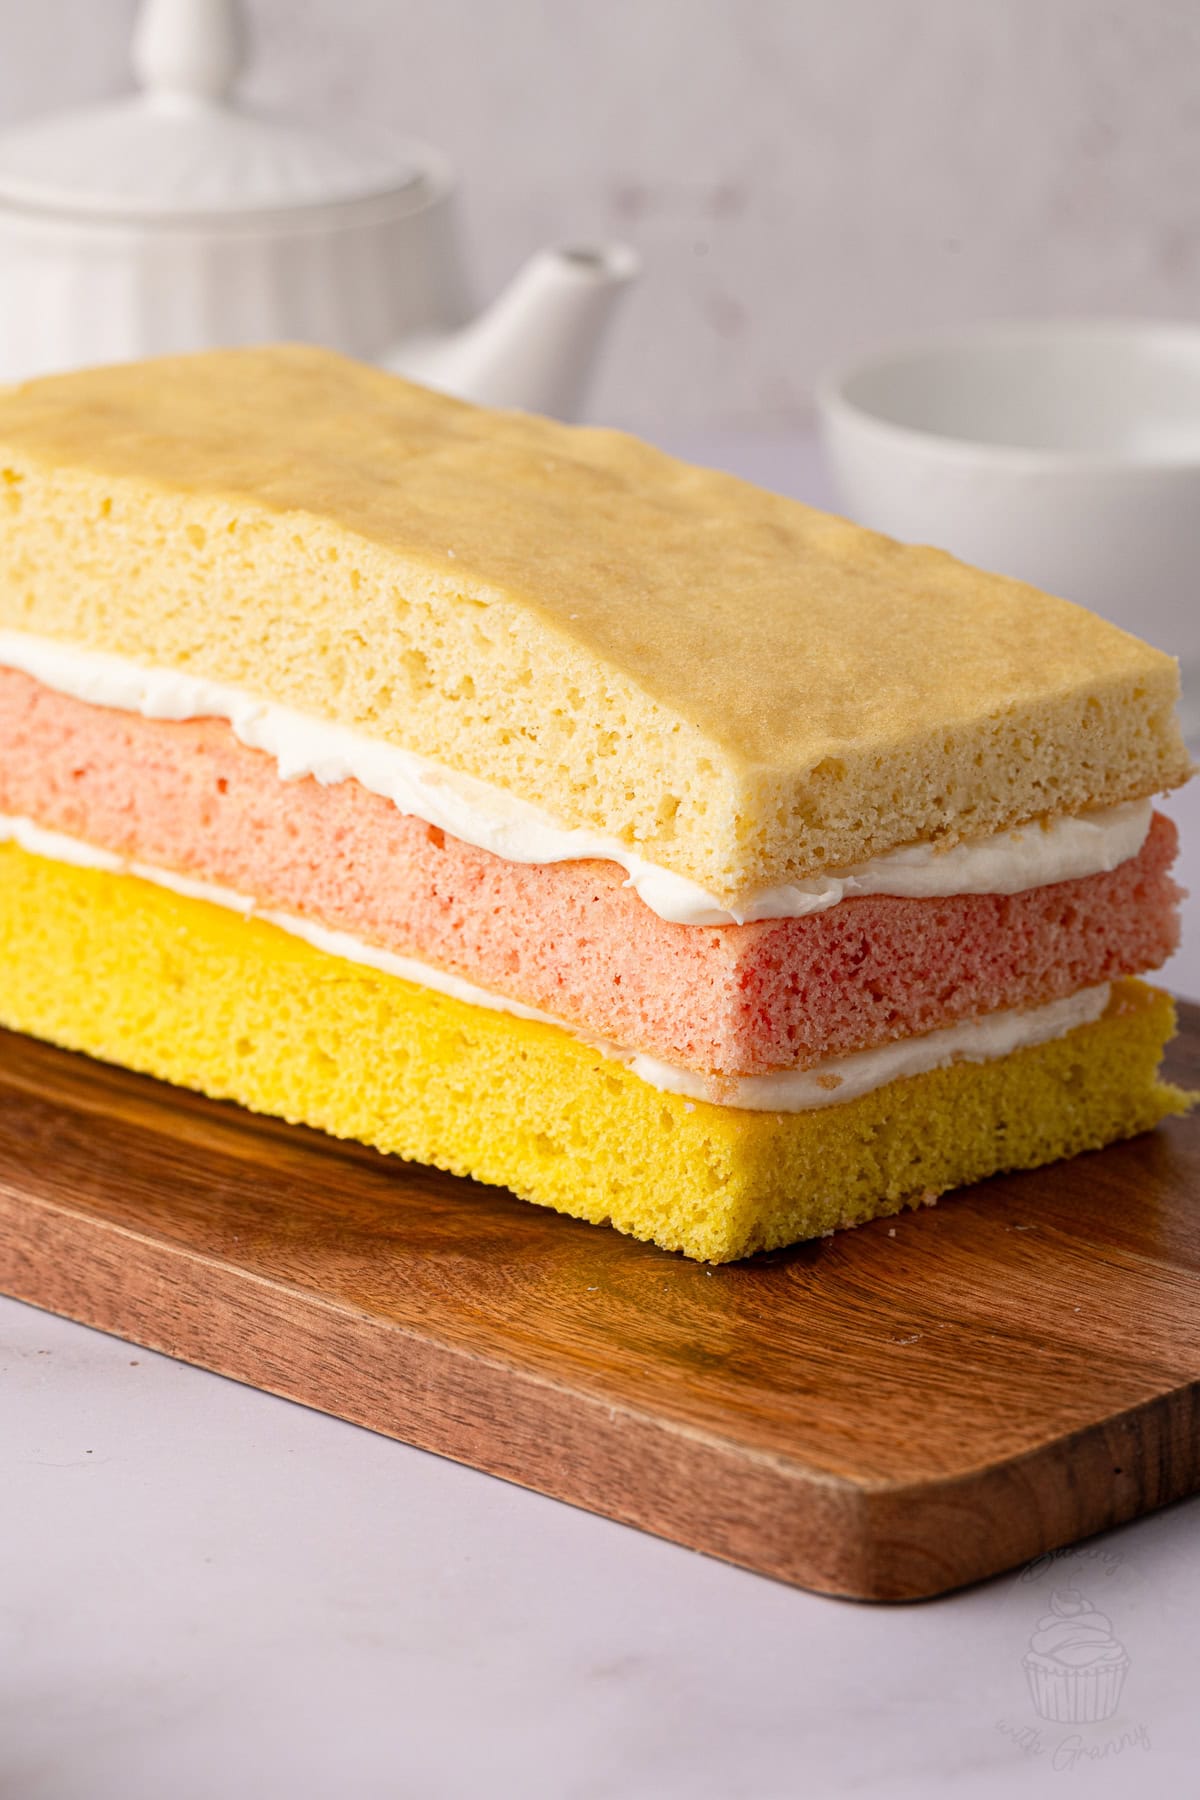
- Spread half the buttercream icing on the top of the yellow cake layer before sandwiching the pink cake layer on top. Spread the remaining buttercream on the pink cake layer before sandwiching the plain cake layer on top.
IMPORTANT NOTE:
All my recipes are developed using a digital scale and the metric system (grams and millilitres). Cup measurements are available as a conversion, but these, unfortunately, won’t always be as accurate. For best results, I always recommend baking with a digital scale.
RECIPE NOTES:
LIKE THIS RECIPE?
Leave a comment and rating below!Originally published in September 2017.