
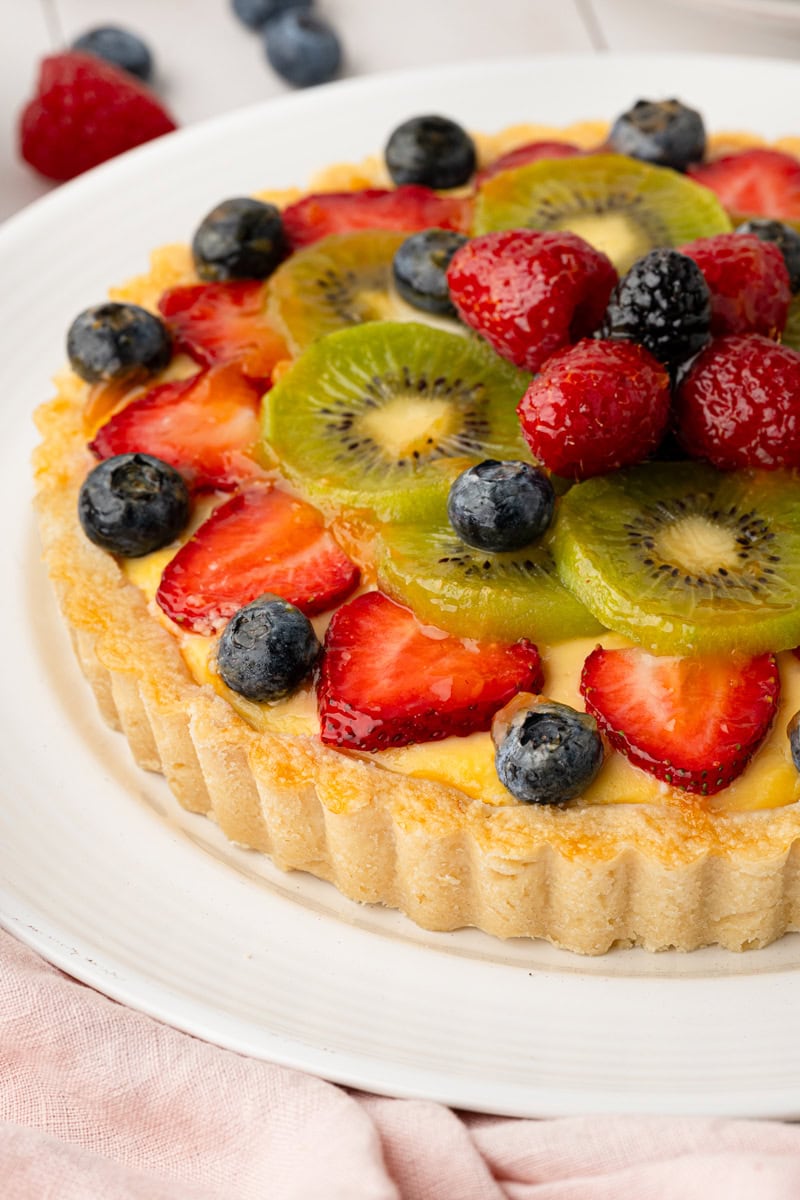
Fruit Tart
Easy homemade Fruit Tart recipe with a rich, golden shortcrust pastry shell filled with thick vanilla custard. Decorated with vibrant fresh seasonal fruit and apricot jam glaze – perfect refreshing summer dessert, BBQ or sunny celebration.
Summarise & Save this recipe on:
Summarise & Save this recipe on:
What is a traditional Fruit Tart?
Fruit Tart is a classic British dessert that always feels (and looks!) a little bit special. With a crisp pastry case, a thick, creamy vanilla custard filling, and plenty of sweet, fresh fruit piled on top. It’s colourful, impressive, and surprisingly simple to make – with just a little bit of patience.
Various versions of fruit tarts have been enjoyed across Europe for centuries – particularly in France, where tarts filled with crème pâtissière (pastry cream) are very popular. While many modern variations exist, the timeless combination of a sweet shortcrust pastry base, filled with rich creamy custard, and topped with plenty of colourful fruit is my favourite.
The Best Fruit Toppings to Use
This is the perfect summer bake for making the most of our amazing seasonal fruit. I tend to favour berries and sliced kiwi for the ultimate contrast of colour and flavour, but there are no hard-and-fast rules here! You can easily customise your tart with:
- Berries: Strawberries, raspberries, blueberries, or blackberries
- Stone Fruits: Sliced peaches, nectarines, or plums
- Other Favourites: Grapes, mandarins, or mango
If there’s a fruit you enjoy eating fresh, it will probably work great on this tart, too!
The Secret to Perfect Pastry and Filling:
The Sweet Shortcrust Pastry Case
For the tart base, I use my favourite sweet shortcrust recipe. If you’ve ever made my Cornflake Tart, Manchester Tart, Jam Tarts, or Scottish Strawberry Tarts before, you’ll already be familiar with it! While shop-bought pastry or a pre-made pie crust will certainly work if you’re short on time, homemade sweet shortcrust pastry really does give the very best flavour and an unbeatable melt-in-your-mouth texture.
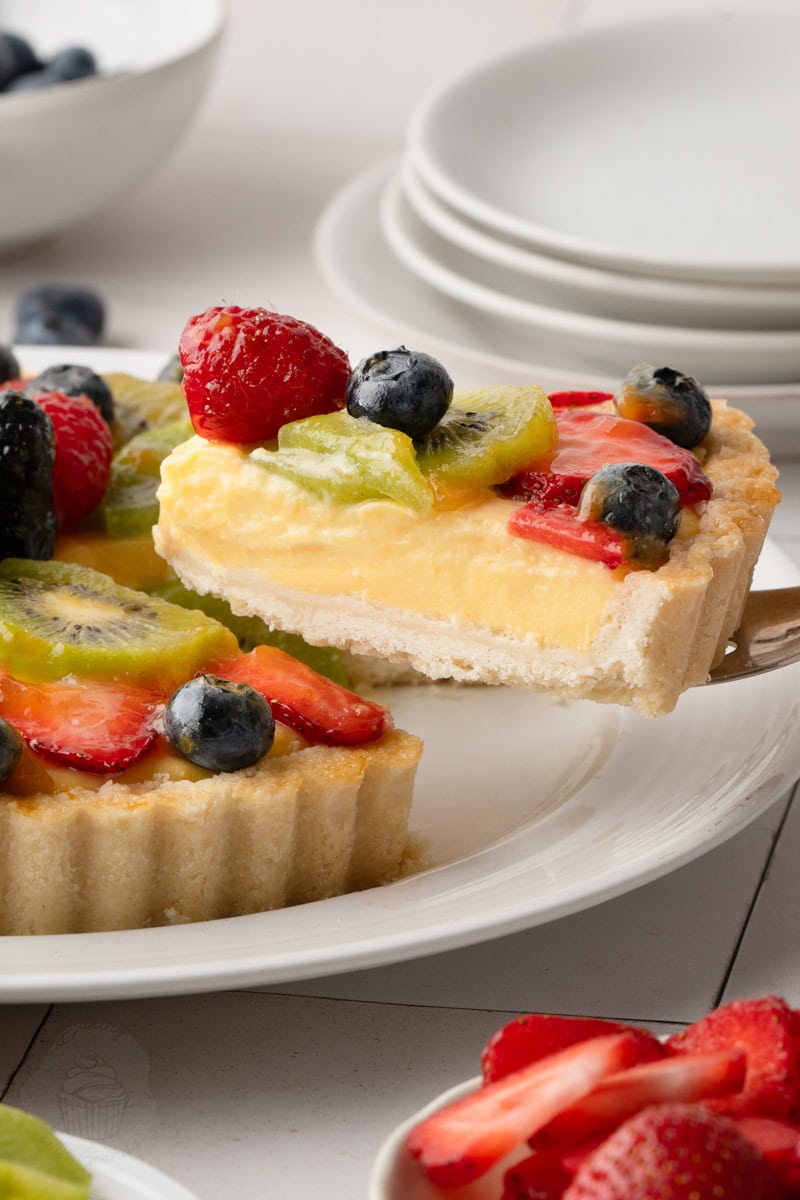
A Traditional Vanilla Custard Filling
Unlike many modern recipes that often use a quick mascarpone or cream cheese filling, this recipe features a traditional homemade custard cream, similar to a French pastry cream and the kind you’ll find in my Custard Tarts and Manchester Tart. It takes a little more time to cook on the hob, but the result is a rich, silky, creamy custard that perfectly complements the tartness of the fresh fruit.
A Lesson in Baking Patience
This isn’t a difficult recipe, but it does require a wee bit of patience. Between chilling the pastry, blind baking the tart case, letting everything cool, and giving the custard at least an hour to set before serving, it’s not really a dessert you can just throw together at the last minute.
The good news? A lot of that time is actually hands-off waiting for chilling, baking & setting, and the show-stopping finished tart is absolutely 100% worth the wait!
Top Tips for Fruit Tart:
- Use a Loose-Bottom Tart Tin: A loose-bottom tart tin makes removing the tart much easier and helps keep the pastry edges neat when serving. Just be sure to also grease and lightly flour your tin before adding the pastry.
- Shop-bought for Time: You can, of course, use a shop-bought pastry if you are short on time – either a ready-made pie case or a ready-roll pastry that you bake at home; both are good options. However, for the best-tasting Fruit Tart, I will always recommend making your own homemade sweet shortcrust pastry.
- Don’t Skip Blind Baking: Blind baking the pastry helps the tart case hold its shape and prevents the base from puffing up while baking. Once the baking beans are removed (careful, they will be hot!), you’ll continue baking until the pastry is fully cooked and a light golden colour.
- Don’t Bin the Whites: The filling calls for egg yolks only, but instead of just binning the egg whites, keep them to make another recipe, like my Meringues or Scottish Japs.
- Cook the Custard Properly: Your custard should be quite thick before adding it to the tart case. It should resemble a yoghurt-like consistency and hold its shape on a spoon. If the custard is too thin, your Fruit Tart won’t set properly once chilled, and it will be tricky to slice. Sometimes the custard can take a little time to thicken, but be patient and stick with it!
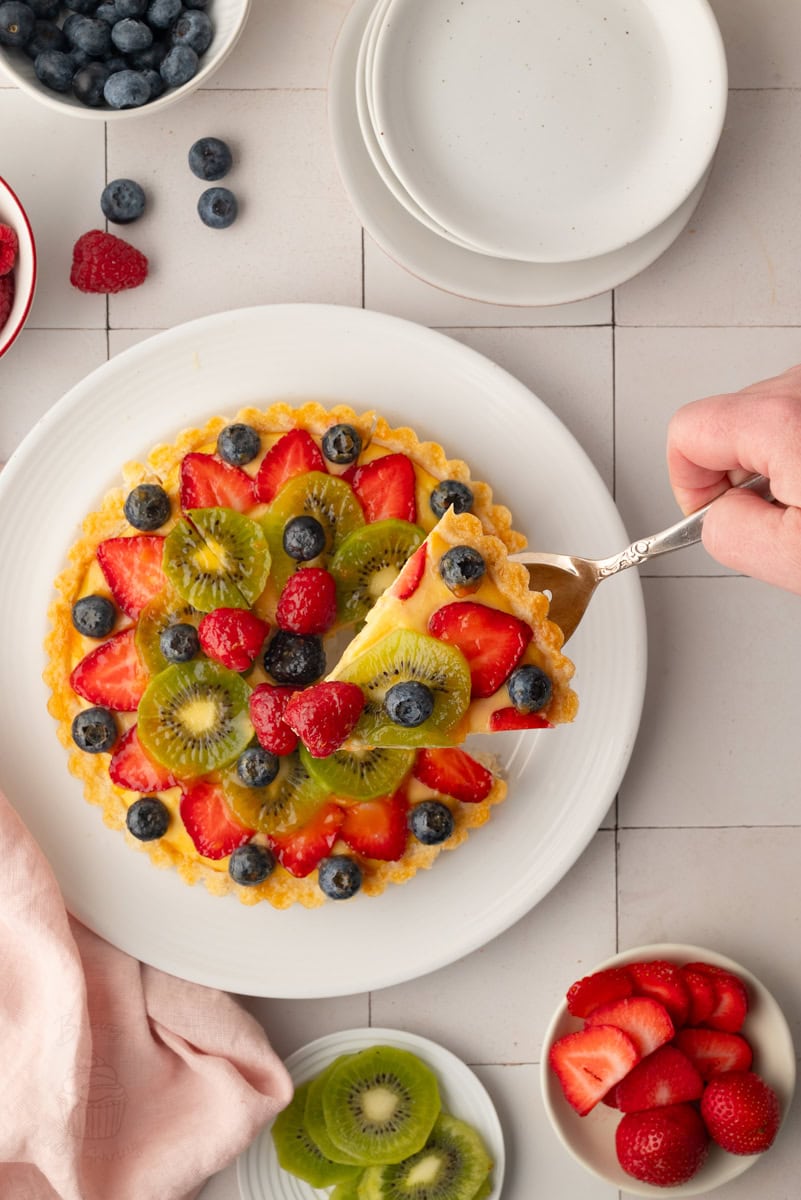
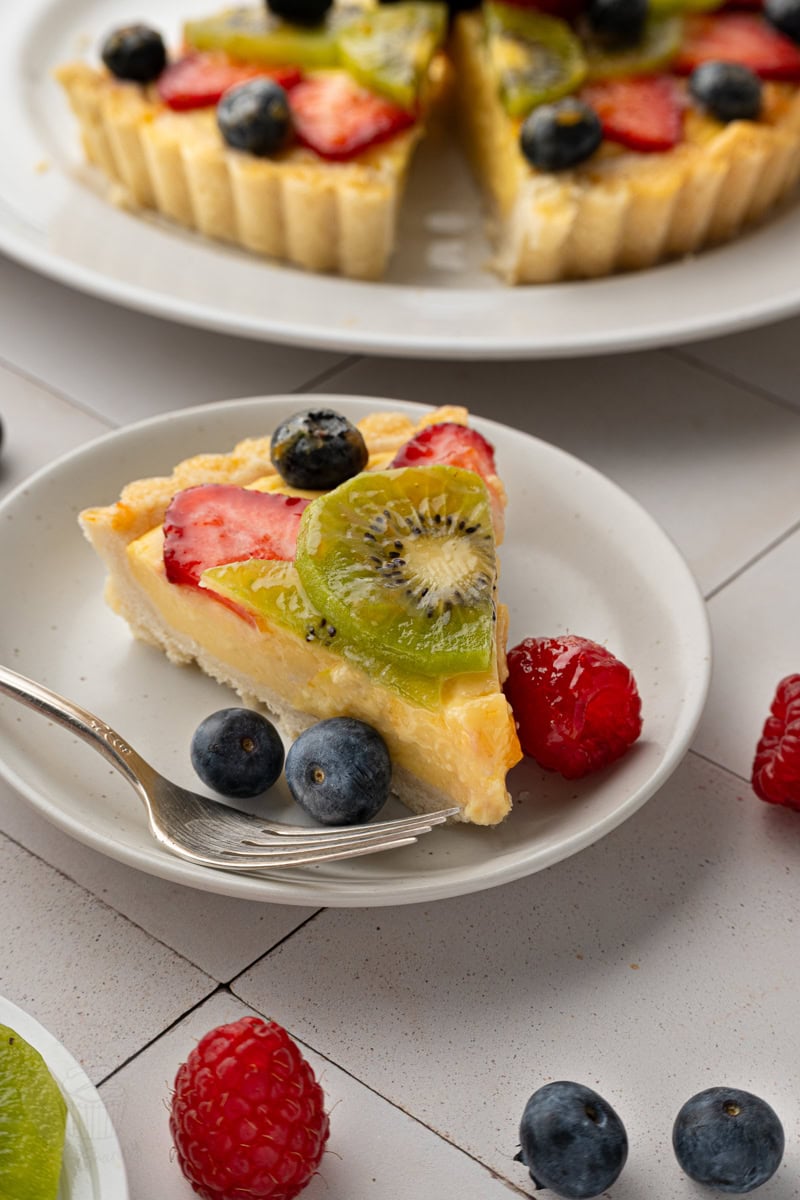
- Use Your Favourite Fruits: There are no rules on what fruits you can use in your Fruit Tart. I personally love berries like strawberries, raspberries and blueberries, along with kiwi slices for some contrast. But you can use whatever fruit you fancy! And you don’t need to lay them on neatly if you don’t have time – that’s purely for the wow-factor and doesn’t impact the taste.
- Don’t Skip the Glaze: Brushing the fruit with apricot jam gives it a lovely shine, keeps it looking fresh for longer and helps any smaller pieces of fruit stay in place.
Save this recipe!
Want to save this recipe for later? Pop your email below and come back to it when you’re ready to bake.

Fruit Tart
INGREDIENTS
For the Pastry:
- 175 g Block Margarine or Butter (at room temperature)
- 65 g Caster Sugar (Superfine Sugar)
- 250 g Plain Flour (All-purpose Flour)
For the Filling:
- 400 ml Milk
- 1 tsp Vanilla Extract
- 3 Free-range Egg Yolks (see notes below)
- 60 g Caster Sugar (Superfine Sugar)
- 2 tbsp Cornflour (Corn Starch)
- Fresh Fruit (berries, kiwi, citrus…)
- 1 tbsp Apricot Jam (Apricot Jelly)
EQUIPMENT
INSTRUCTIONS
For the Pastry:
- Preheat your oven to 180°c (160°c for fan-assisted ovens, Gas Mark 4 or 350°F). Lightly grease a 20cm (8-inch) loose-bottom tart tin and dust with flour. Set aside.
- In a large bowl, cream together the caster sugar and butter/margarine until light and fluffy. Add the flour and mix to create a dough – you may need to use your hands.
- Transfer the dough to a floured surface and gently knead until it is smooth. Wrap the pastry in clingfilm and pop it in the fridge to firm up for 30 minutes.
- On a lightly floured surface, roll your pastry dough into a large circle until it is a few centimetres larger than the diameter of your tart tin (around 26-28cm / 10-11 inches). Carefully transfer the pastry dough to your prepared tart tin, taking care not to trap too much air underneath, and gently press it into the sides. Leave a little overhang on the pastry, but trim off any large bits of excess overhang. Prick the bottom of your pastry with a fork, then line it with greaseproof paper and fill it with baking beans.
- Blind bake the pastry for 15 minutes before carefully removing the paper and baking beans (watch out, they will be hot!) and return the tart pastry to the oven to continue baking for a further 5-10 minutes, until it is a light golden colour. Remove from the oven and trim the remaining excess pastry overhang to leave a neat edge on your tart. Set aside while you prepare your filling.
For the Filling:
- Add the milk and vanilla to a large saucepan and bring to the boil over a medium heat.
- In a large bowl, beat the egg yolks, caster sugar and cornflour together until well combined.
- Slowly pour the hot milk over the egg mixture, whisking continuously until everything is smooth and combined. Pour the custard mixture back into the saucepan over medium heat, stirring continuously until very thick (think yoghurt in texture) – this may take up to 10 minutes. Remove from the heat and leave to cool slightly.
- Pour the filling into the pastry and smooth it into the edges before topping with fresh fruit.
- In a small bowl or cup, mix the apricot jam with a tablespoon of boiling water until you have a thin sticky glaze. Brush the fruit with the apricot jam glaze to finish.
- Leave to set in the fridge for at least 1 hour, or until the custard is fully set. Once set, remove from the tin and cut into slices to serve.
IMPORTANT NOTE:
All my recipes are developed using a digital scale and the metric system (grams and millilitres). Cup measurements are available as a conversion but these, unfortunately, won’t always be as accurate. For best results, I always recommend baking with a digital scale.
NOTES
Egg Size:
When it comes to eggs, I always buy the Mixed-weight Free-range Eggs. Generally speaking, egg size doesn’t make a huge difference in most baking, unless you are using sizes that lean into the extremes. But with that in mind, medium-sized eggs are probably the best option if you are unsure what size eggs to use.Storage:
Store your Fruit Tart covered in the fridge for up to 3 days. The fresh fruit and custard filling means it should always be kept chilled. The pastry will gradually soften over time, and the fruit juices may bleed into the custard, so it is best enjoyed within the first couple of days.Freezing:
I don’t recommend freezing a fully assembled Fruit Tart, as both the custard and fresh fruit can become watery once thawed. However, the baked pastry case can be frozen for up to 3 months. Simply allow it to cool completely, wrap well, and freeze until needed.Substitutions:
- Pastry: You can use a shop-bought short-crust pastry if you prefer; however, it won’t be as sweet or rich as preparing your own homemade pastry. You could also use a ready-made pastry case if you are short on time, but again, the flavours won’t be quite as nice as homemade.
- Fruit: One of the best things about a Fruit Tart is how versatile it is. Strawberries, raspberries, blueberries, blackberries, kiwi, grapes, peaches, nectarines, mandarins, and mango all work beautifully. Use whatever fruits are your favourite or are in season.
Tried this recipe?
Tag @bakingwithgranny or use the hashtag #bakingwithgranny!Frequently Asked Questions:
A Fruit Tart is a classic dessert made with a sweet shortcrust pastry case, a filling of custard cream, and fresh fruit on top. Fruit Tarts are popular throughout Europe, including the UK and are often served during the summer months when fresh fruit is at its best.
You can use almost any fresh fruit you like! Strawberries, raspberries, blueberries, blackberries, kiwi, grapes, peaches, nectarines, and mandarin segments all work particularly well. A mixture of colours and textures usually gives the best result – both visually and taste-wise.
Blind baking the pastry allows the pastry to bake evenly, while the baking beans (pie weights) push the pastry down and prevent it from rising. You then remove the baking beans for the second half of the bake to ensure you get a crisp finish on your pastry. Skipping the blind bake will mean your pastry is likely to rise, as well as bake too quickly and possibly burn in places.
Yes. Ready-made shortcrust pastry or a pre-made pie case can be used if you’re short on time. However, homemade sweet shortcrust pastry gives the best flavour and texture, and is what I would recommend for this recipe.
Yes. Fruit Tart is a great make-ahead dessert. You can prepare it the day before serving and keep it chilled in the fridge overnight. In fact, allowing it plenty of time to chill helps the custard set properly.
Fresh fruit is best for both appearance and texture. Frozen fruit tends to release excess moisture as it thaws, which can make the custard watery, as well as affecting the look of the finished tart.
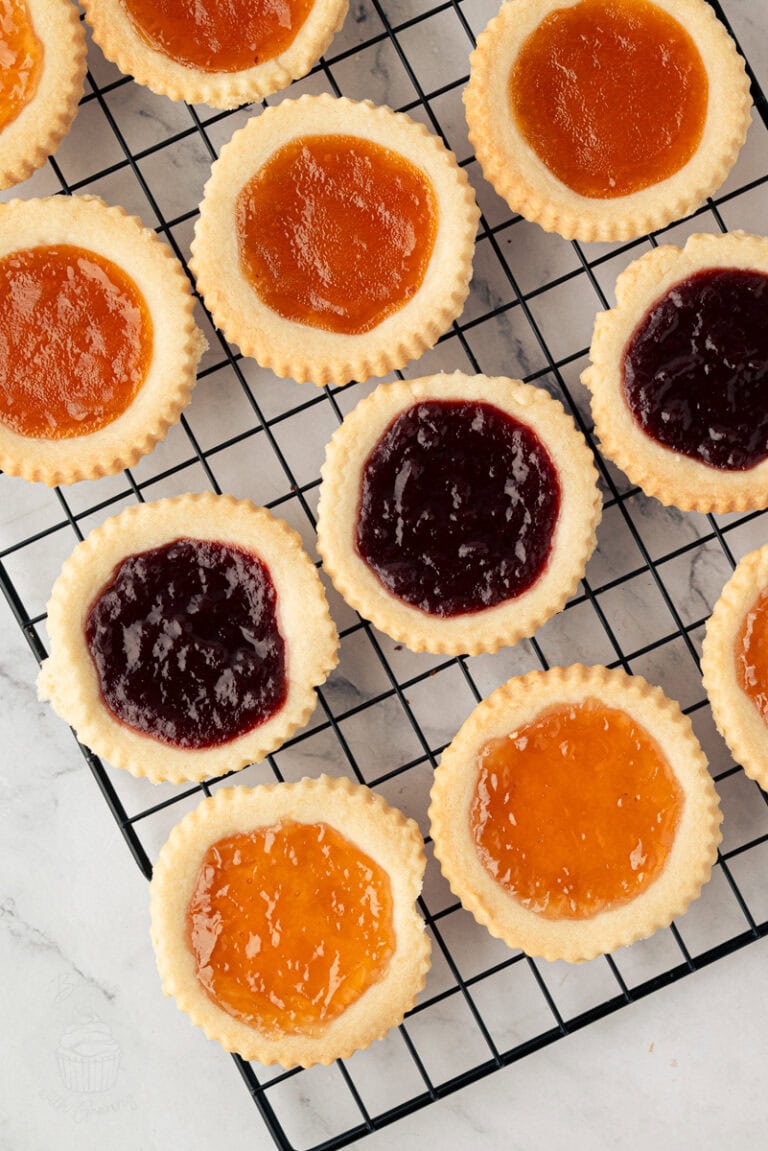
Yes! You will have to adjust your baking times to reflect the smaller-sized pastry cases, but you can absolutely use this recipe for individual Fruit Tarts.
Free-from & Vegan:
Gluten-free Options:
To make a gluten-free Fruit Tart, you can swap the plain flour in the pastry for a gluten-free plain flour blend. I haven’t tested this myself, but I know people have had success with this swap in some of my other pastry recipes, so it should work here too. Cornflour is usually gluten-free, but I would always recommend checking the individual brand you are using to be safe.
Nut-free Adjustments:
This recipe is naturally nut-free, but always check the labels, particularly on your jam and coconut, to be safe when serving to those with nut allergies.
Dairy-free Swaps:
To make a dairy-free Fruit Tart, simply use a dairy-free block margarine in the pastry, and your favourite milk-alternative in the filling – I have had success using soya milk, but most milk-alternatives should work just fine.
Egg-Free Adaptions:
To make an egg-free Fruit Tart, you would need to use an alternative filling to the traditional egg custard. Addicted to Dates has a great-looking recipe for a Vegan Pastry Cream that, in theory, could work well in place of the egg custard filling. I haven’t tested this, but if you do, please share the results with me!
Vegan Substitutions:
To make a vegan Fruit Tart, you can follow the tips above: swap the butter for a dairy-free margarine in the pastry, and try an alternative filling to the egg custard cream, like Addicted to Dates Vegan Pastry Cream.
Allergy Disclaimer & Resources:
Any advice or suggestions to make recipes “free-from” or vegan are purely suggestions. Please double-check all packaged ingredients individually, taking extra caution when baking for those with allergies or intolerances.
For official guidance on food allergies, please see Food Standards Agency (food.gov.uk) | For more info on coeliac disease, please see Coeliac UK (coeliac.org.uk) | For more info on a vegan diet, please see The Vegan Society (vegansociety.com)
With thanks to Naomi Seiler for creating these photos.Z

ABOUT THE AUTHOR
Amy Reid
Amy Reid is an award-winning food blogger, mother, wife and cookbook author. Inspired by her childhood in the kitchen with her Mum – a professional baker and her children’s Granny – Amy now shares her tried-and-tested traditional home baking recipes with bakers of all abilities around the world. She lives in Scotland with her husband, two sons and her small pack of Siberian huskies.