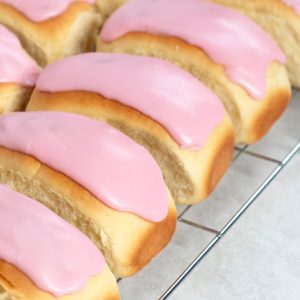
Iced Finger Buns
Super simple in concept but super delicious in taste. Iced Finger Buns are sweet yeast buns, topped with sticky icing. A real British classic!

There are some bakes that are almost too simple to work, but somehow they do. And not only that, they are somewhat iconic. Iced Finger Buns are certainly one of those bakes.
A classic sweet dough, topped with a layer of icing; talk about the simple pleasures in life! But when it comes to the perfect mix of sweet and carbs, Iced Finger Buns have it nailed. Always my first choice of treat from a bakery, it seemed fitting that I’d give baking them a go. Plus, the kids love them too, so I knew they’d be a big hit with our entire household.
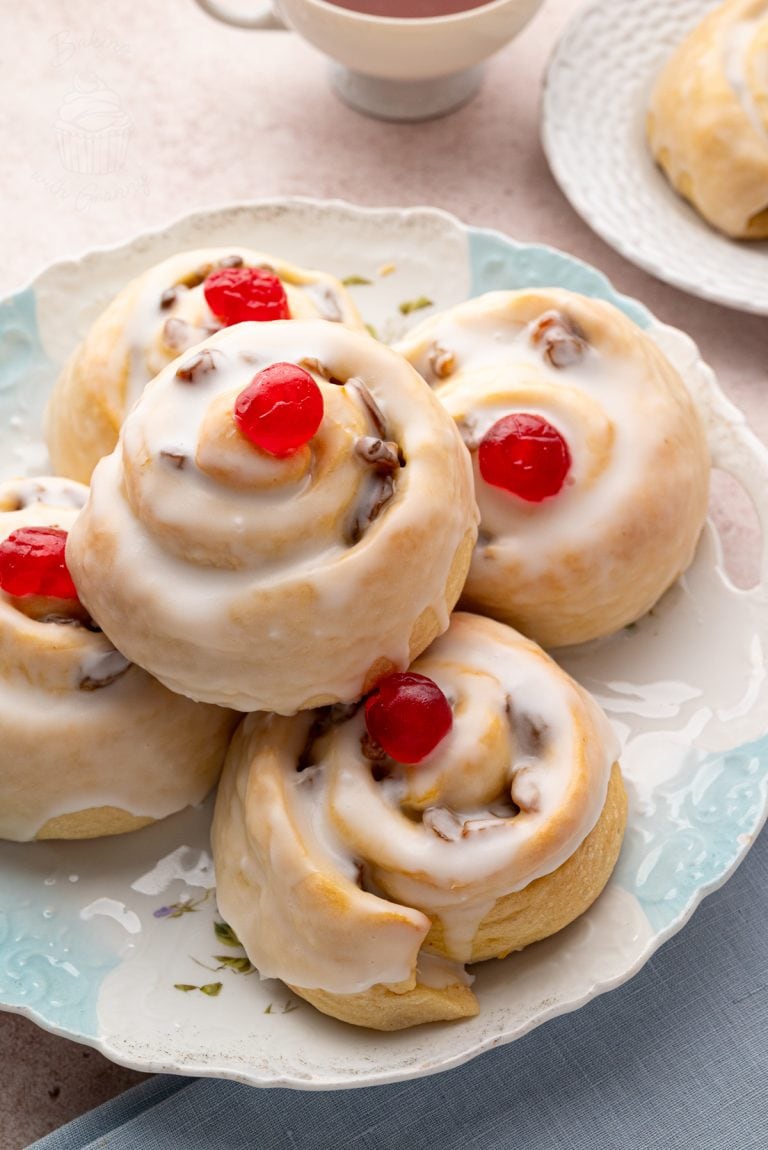
My personal favourite way to finish a Finger Bun is by dipping the just-iced buns in some desiccated coconut. The kids, however, love anything with a coloured icing (pink or yellow are the classics for iced buns) or with some sprinkles attached.
And if you want to go all-out glutton, slice the bun in half and fill it with some freshly whipped cream! Suddenly, a simple, unassuming bun becomes the bake of your sugar-coated dreams.
Eagle-eyed readers may notice that I’ve used the same sweet dough that is in one of my most popular recipes – Cinnamon Buns. It is sweeter than your standard yeast dough, but whoever said this was a health food?
These Iced Finger Buns do take a bit of time to prepare, purely due to the rise times…but don’t let that put you off! They really are minimal effort, with maximum gain, with only the pain of waiting through the in-between stages holding you back. And even then, that’s surely the perfect excuse to have a cuppa and maybe make a tray bake (or two) while you wait?

Ingredients for Iced Buns:
Milk
Whatever milk you have to hand will work fine – I’ve had good success with dairy & soya. But if you are buying some just for this recipe, definitely opt for full-fat. Let’s not be doing things by halves!
Butter or Margarine
Either will do, and it’s personal preference which you choose. I opt for margarine as a way to omit the dairy, but just be sure to use a block margarine if you decide to use margarine too – the spreadable kind has a higher water content and will make your dough less predictable to work with.
Plain Flour and Strong White Flour
The best of both worlds in this dough! Plain flour is a nice light flour which lends itself well to the texture of these Iced Finger Buns. But the combination of strong white flour & its additional gluten helps to maintain the real doughy consistency.
Caster Sugar
The dough is definitely on the sweeter side, and that is thanks to the sugar. You could change to Golden Caster Sugar for a more caramel-y taste, should you desire.
Easy Yeast
There are a few options out there for yeast, but easy is by far, well, the easiest! Plus, it’s packaged in perfect amounts.
Free-range Eggs
These will help your dough bind together, and the yolks will give the dough that lovely golden colour. I don’t tend to stress too much about the size of eggs, as long as they’re free-range.
Icing Sugar
Without this, we’d just have some plain, sad-looking buns. Add some colour, top with sprinkles…whatever your heart (and sweet tooth!) desires.

Top Tips for Iced Finger Buns:
• For uniformly sized buns: Weigh your dough after it’s first rise, before dividing that number by 12. Then simply weigh out each bun as you come to shape them.
• I recommend using a metal baking/roasting tin for this UK recipe for Iced Finger Buns. Having experimented with different types of trays, tins and dishes, I find a metal tin to be the best for an even bake. This Masterclass one is my favourite and what you see in the photos.
It is, of course, possible to use a ceramic dish; however, you may need to adjust your oven temperature and baking time to ensure the buns in the middle are baked through.
• This recipe for Iced Finger Buns makes buns that are a generous size. If you prefer your buns to be smaller, simply divide the dough into 18 or even 24 buns.
• For extra indulgent buns, why not slice them in half and fill them with jam & cream? Or top the icing with some desiccated coconut, or rainbow sprinkles?

Save this recipe!
Want to save this recipe for later? Pop your email below and come back to it when you’re ready to bake.
INGREDIENTS
- 200 ml Milk
- 115 g Block Margarine or Butter
- 300 g Strong White Flour (Bread Flour)
- 250 g Plain Flour (All-purpose Flour)
- 140 g Caster Sugar (Superfine Sugar)
- 7 g Easy Bake Instant Yeast (Fast-action Yeast) (usually 1 sachet)
- 2 Free-range Eggs (beaten)
- 200 g Icing Sugar (Powdered Sugar)
- Food Colouring (optional)
INSTRUCTIONS
- In a small pan, warm the milk & butter/margarine until it's lukewarm (not hot!) and the butter/margarine is melting.
- Meanwhile, sift the flours into a large bowl. Gently mix the sugar and yeast through to combine. Add the milk mixture and stir in a little, before adding the eggs too. Mix until you have a soft, slightly sticky dough.
- Transfer the dough to well-floured surface, and using well-floured hands, knead the dough for around 10 minutes.
- Place the dough into a oiled bowl (to prevent it from sticking) and cover with an oiled piece of cling film, or a damp tea towel. Leave to rise in a draught-free location for 1-2 hours, or until it has doubled in size.
- Lightly grease a large baking/roasting tin (I use a 35cm x 24cm one) and dust it with a little flour. Set aside.
- After your dough has doubled in size, turn it out onto a lightly floured surface and knock it back. Divide your dough into 12 even-sized balls, before rolling each between your hands to create a sausage shape. Place the sausage-shaped buns into your prepared tin, in two rows of 6, with a little space between each (they need room to grow!). Cover loosely with lightly greased cling film or a damp tea towel.
- Leave to rise in a warm place for 1-2 hours until they look light and puffy.
- Once the buns have completed their second rise, bake them in a pre-heated oven at 180°c (160° for a fan-assisted oven, Gas Mark 4 or 350°F) for 15-20 minutes until golden in colour and have a hollow-like sound when gently tapped on top.
- Allow the buns to cool in their tin before icing. To ice the buns, mix 200g of icing sugar with a little cool water (start with a teaspoon of water and gradually add more as needed – it's easy to add more water but not easy to correct too much). Add a little pink food colouring if you wish. You want a thick gloopy texture if you intend to spread the icing, or a slightly thinner consistency if you intend to pour the icing or dip the buns.
IMPORTANT NOTE:
All my recipes are developed using a digital scale and the metric system (grams and millilitres). Cup measurements are available as a conversion but these, unfortunately, won’t always be as accurate. For best results, I always recommend baking with a digital scale.
NOTES
Tried this recipe?
Tag @bakingwithgranny or use the hashtag #bakingwithgranny!
Originally published in January 2020. Updated in September 2023.


Followed the recipe exactly as shown, but found the buns much to sweet. Has a misprint been made as to the amount of sugar in it?
Far too much butter, hence why my dough didn’t rise. So I’ve Looked at other ice bun recipes and they use less than half! Going to start again with another recipe. Fingers crossed.
After trying this recipe, sadly the dough didnt double in size and felt rather heavy which i think was due to the quantity of butter possibly.
Sadly my first try ended up in the bin, they were flat and heavy
Could I just use plain flour for this – bread flour is very hard to get in Sri Lanka and when we can find it, it’s super expensive.
I’ve just printed another recipe like this one which is for basic sweet bread and it says to use plain flour, so I’m sure it will be fine. Just try it!
This turned out absolutely perfectly. The buns were light, soft and fluffy – just like you would find in a British bakery. The tip to make them in the roasting tin was key to the success. Will we certainly be making this recipe again!