Upside-down Pineapple Cake
A stunning cake, with the perfect tropical flavour. Upside-down Pineapple…
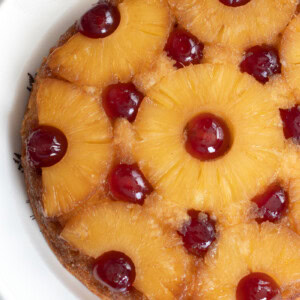
A stunning cake, with the perfect tropical flavour. Upside-down Pineapple Cake is a true showstopper!

You know me, I love a simple bake, especially one that looks deceivingly like a showstopper with very minimal effort. This upside-down Pineapple Cake is just that! A delicious sponge, topped (bottomed?) with glowing rings of pineapple and gems of glacé cherries.
When I first started researching Upside-down Pineapple Cake, I was quite surprised by two things…
One: The number of recipes I found that don’t use glacé cherries! I know not everyone is a fan of a glacé cherry, but to me, they are an important part of a pineapple cake, adding a bit of colour and interest, not to mention that sweet, candy-like punch too.
And two: Just how many upside-down cake recipes are there that don’t actually involve any kind of upside-down at all! Instead, opt to place the pineapple on top of the sponge. Madness!
Rest assured, this Pineapple Upside-down Cake does indeed use cherries and is a literally upside-down cake, with the fruit baked under the cake, before being flipped onto the plate to reveal its true beauty. The eagle-eyed amongst us might even notice that the sponge follows the same recipe as one of our Victoria Sponge cakes.
It’s easy to prepare – depending on how much of a perfectionist you are with your pineapples, that is. This recipe uses store cupboard ingredients, and can be from a cake batter to the plate in less than an hour… Upside Down Pineapple Cake is the perfect pudding for when you are in need of a bit of sweetness.
And hey, it has fruit! That means it is healthy, right?!

Ingredients for Pineapple Upside-down Cake:
Soft Brown Sugar
Before we add the fruit to the bottom (top?) of our upside-down cake, we add a bit of “cake glue”. In other words, a smearing of sugar and butter/margarine. This not only helps keep the pineapple in place, but it adds a nice sweet, almost caramelised-like finish to it too.
Butter or Margarine
As well as using butter or margarine in our “cake glue”, it goes into the sponge portion of the recipe too. I find margarine to be better and more predictable for sponge cakes, but it’s personal preference which you opt for. If using butter, just be sure to remove it from the fridge and allow it to soften before using.
Pineapple
This recipe uses tinned pineapple – using fresh pineapple is, of course, possible, but I would imagine it will dry out a bit whilst baking and not give as nice a finish, in terms of appearance & taste. Instead, you want a tin of pineapple rings, preferably in juice, as opposed to syrup.
Glace Cherries
The little gems that complement the pineapple so well! Be sure to halve them so they are a similar thickness to the pineapple slices.
Caster Sugar
The go-to sugar in a sponge cake. Finer than granulated sugar, so it mixes in like a dream.
Eggs
The size of the eggs doesn’t matter too much (I always use medium) but just be sure you’re using free-range eggs. And as with all ingredients when baking a sponge cake, ensure they are at room temperature before starting.
Self-raising Flour
Again, flour is a must in a cake batter, and self-raising flour is used here to allow it to rise. No additional raising agents are required, but be sure to sift the flour.


Tips for Upside-down Pineapple Cake:
• For this pineapple cake recipe, you want to use tinned pineapple rings in juice. If you can’t get tinned pineapple rings, you can always use pineapple chunks and arrange them in whatever creative way you can think of.
• This recipe for Pineapple Upside-down Cake uses glace cherries, but you could use maraschino cherries, if you prefer. Glace cherries are more widely available in the UK and the preferred cherry of choice for most home baking.
• You can experiment with different fruits, such as peaches or pears. Be creative and enjoy the varying flavour results!

Upside-down Pineapple Cake
INGREDIENTS
- 40 g Soft Light Brown Sugar (Light Brown Sugar)
- 40 g Butter or Margarine
- 4-5 Tinned Pineapple Slices (Rings) (tinned, in juice)
- Glacé Cherries (Candied Cherries) (halved)
- 110 g Caster Sugar (Superfine Sugar)
- 110 g Butter or Margarine (softened)
- 2 Free-range Eggs (at room temperature)
- 110 g Self-raising Flour
INSTRUCTIONS
- Pre-heat your oven to 180°c (160°c for fan assisted oven or Gas Mark 4) and generously grease a 7-inch cake tin with some extra butter/margarine.
- In a small bowl, mix together the soft brown sugar with the 40g of butter/margarine. Evenly spread the mixture to the bottom of your pre-greased cake tin.Take your pineapple rings and gently pat the excess juice off them with a clean cloth. Arrange the pineapple as desired on the bottom of your tin (on top of the sugar/butter mixture). Place half a glace cherry into the middle of each pineapple slice and in any gaps around that you think need filling.Set aside.
- In a large bowl, cream together the caster sugar and 110g of butter/margarine, until it is light and fluffy.
- Add the eggs one at time, ensuring each is mixed through before adding the next. Sift in the flour and gently fold to create a batter.
- Spoon the batter into your prepared tin, on top of your pineapple slices, spreading evenly to the edges. Bake in your pre-heated oven for 20-30 minutes until risen, golden and a skewer inserted comes out clean.
- Allow the cake to cool in it's tin for a short while. To remove from the tin: run a knife around the edge to loosen the cake from the sides. Next place a plate on top of the cake, before flipping over – the cake should fall out of the tin and onto the plate but you might need to give it a tap if it is being stubborn.
- Enjoy whilst still warm with a scoop of ice cream! You should get 6 generous slices, or 8 slightly smaller ones.
IMPORTANT NOTE:
All my recipes are developed using a digital scale and the metric system (grams and millilitres). Cup measurements are available as a conversion but these, unfortunately, won’t always be as accurate. For best results, I always recommend baking with a digital scale.
Tried this recipe?
Tag @bakingwithgranny or use the hashtag #bakingwithgranny!Pineapple Upside Down Cake is a traditional cake, dating back to the early 20th century. It is usually made with pineapple and cherries, but you can do just pineapple, or even mix up your fruit choice entirely.
The pineapple is placed at the bottom of your cake tin, and the cake batter poured on top. Once you have baked the cake, you turn it upside down (hence the name) and end up with a beautiful and equally delicious dessert cake.
It is really easy to make Pineapple Upside-down Cake! You start by placing your pineapple rings and cherries at the bottom of your cake tin, with a lovely brown sugar paste. On top of that, you spread your sponge mixture, which is made of butter/margarine, sugar, eggs and flour. You then bake the cake for about half an hour. Once your cake has cooled down, you turn it out onto a plate, leaving it upside down and showing off the beautiful pineapple top (bottom?).
I would always suggest using pineapple rings (aka segments, slices…) that are tinned and in juice, as opposed to syrup. This is what I have always used and it works well. You could try using fresh pineapple, but I cannot guarantee this will be successful.
Pineapple Upside-down Cake can be served as is, or you can have it with fresh cream, ice cream, custard…whatever you fancy! I like it when it’s still a little bit warm, but it is just as delicious cold.
Free-from & Vegan:
Nut-free: This is a nut-free Upside-down Pineapple Cake recipe. Be sure to check individual ingredients for any hidden nuts when serving to those with allergies.
Gluten-free: To make this a gluten-free Upside-down Pineapple Cake recipe, simply swap out the self-raising flour for a gluten-free self-raising flour.
Dairy-free: To make this a dairy-free Upside Down Pineapple Cake recipe, simply use a dairy-free margarine, as opposed to butter.
N.B. Any advice or suggestions to make recipes “free-from” or vegan are purely that – suggestions. Please be careful to double-check all ingredients individually, taking extra caution when serving to those with allergies & intolerances.
For more info on common food allergies, please see food.gov.uk | For more info on coeliac disease, please see coeliac.org.uk | For more info on a vegan diet, please see vegansociety.com

This recipe was originally published in February 2021. Last updated in June 2023.