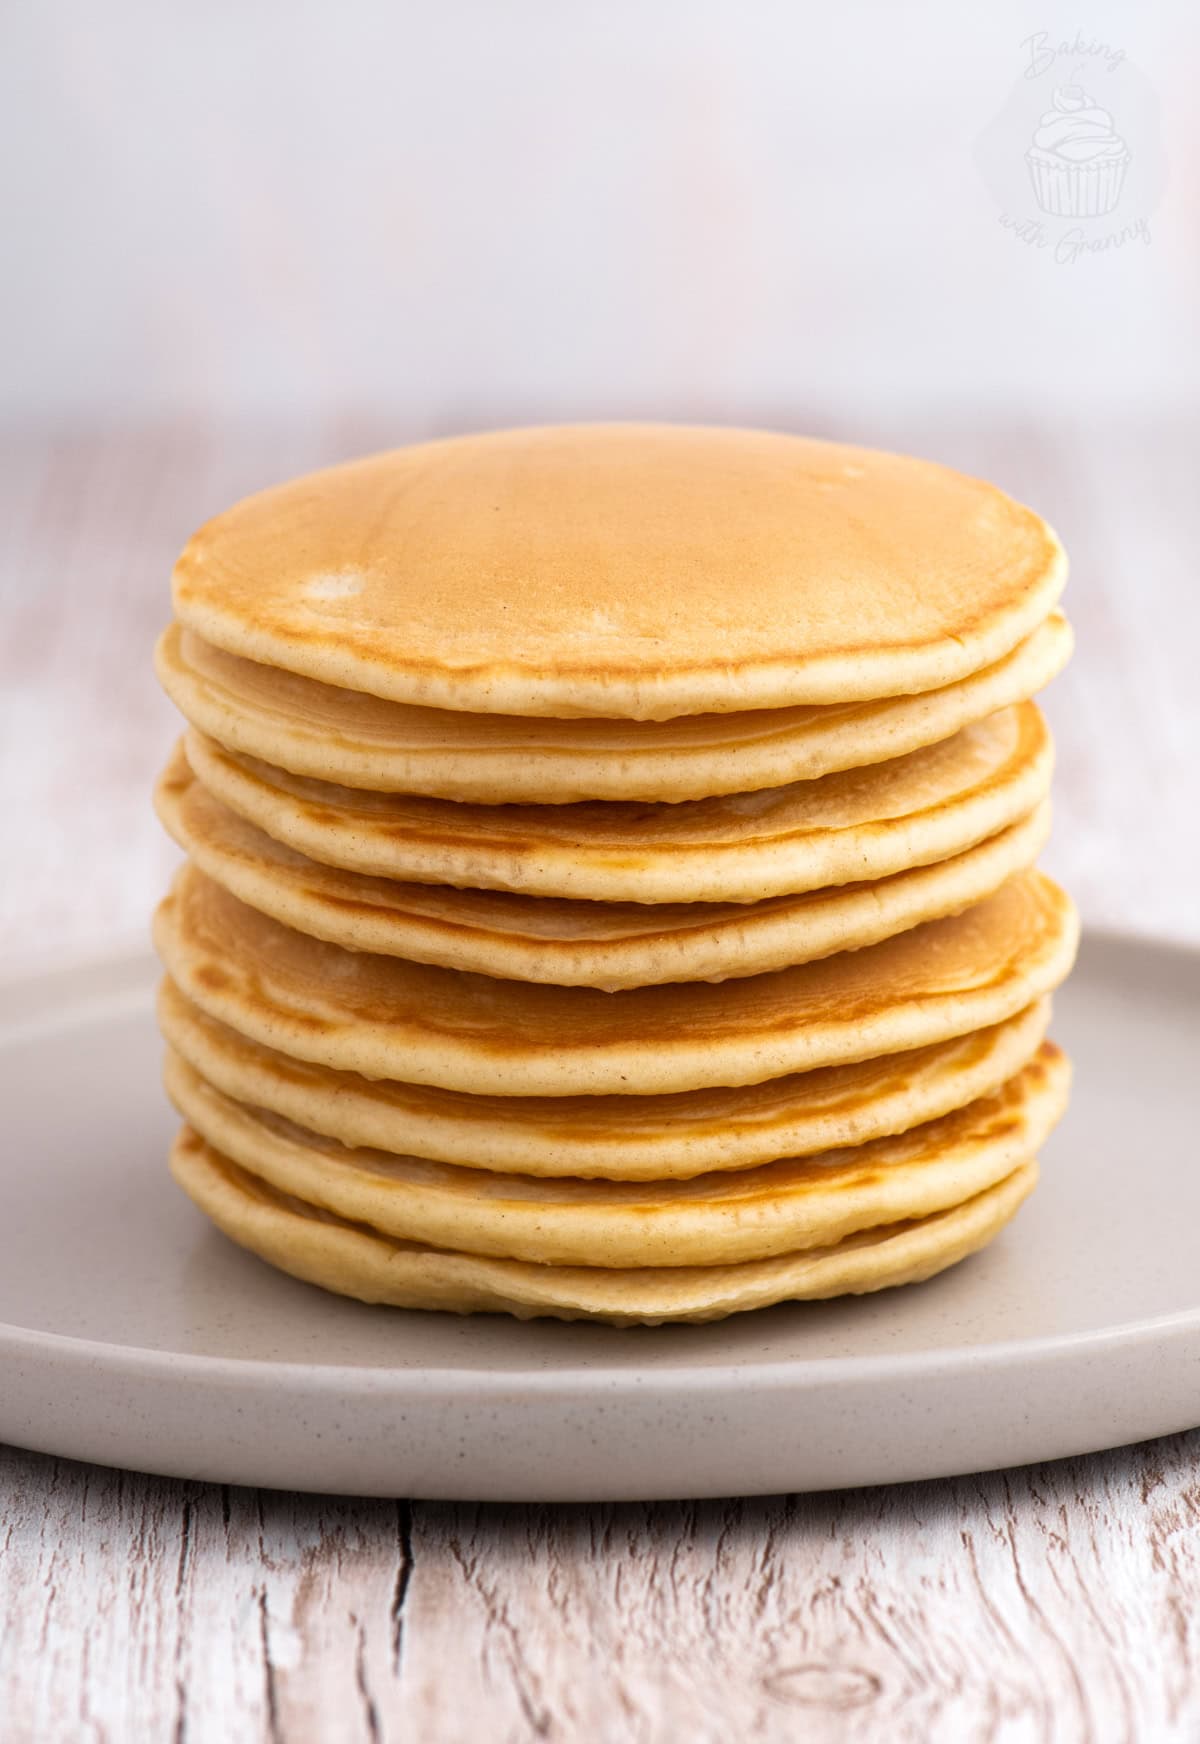
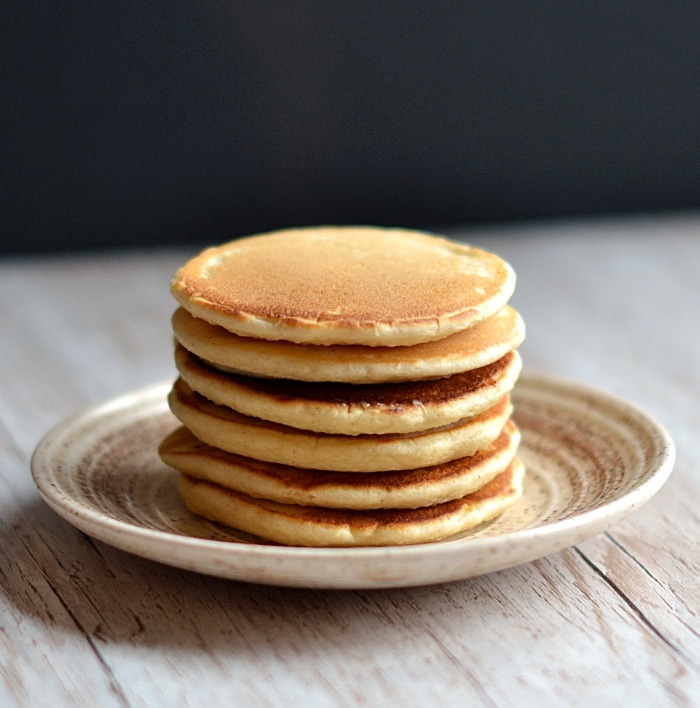
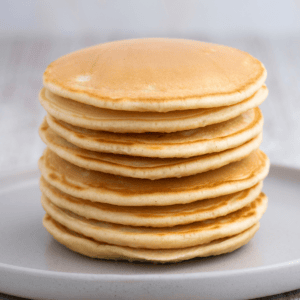
These traditional Drop Scones, also known as Scotch Pancakes or Scottish Pancakes, are soft, fluffy little pancakes cooked on a hot girdle, griddle or frying pan. I’ve been making them since childhood – initially with my Mum’s help! – and her little trick of adding oil to the batter keeps them lovely and soft, particularly handy if you’re batch baking some to freeze or enjoy later.
Drop Scones Recipe Snapshot
- Also Known As: Scotch Pancakes, Scottish Pancakes and Dropped Scones.
- Texture: Soft and fluffy – thicker than traditional British pancakes but not as thick as American pancakes.
- Difficulty: Very easy.
- Prep Time: 10 minutes.
- Cook Time: 20 minutes.
- Serves: Approx. 12 pancakes.
- Dietary Info: Nut-free, with substitutions for gluten-free, egg-free, dairy-free and vegan included below.
- Cooked On: A hot girdle or frying pan.
- My Mum’s Top Tip: A spoonful of oil in the batter helps keep the pancakes soft, especially when batch baking
- Best For: Breakfast, teatime, Pancake Day or freezing for later
Summarise & Save this Recipe on:
What are Drop Scones?
Drop Scones are small, soft and fluffy Scottish pancakes made by dropping spoonfuls of batter onto a hot girdle or frying pan. They’re also commonly known as Scotch Pancakes or Scottish Pancakes, while some families call them Dropped Scones.
They’re thicker and more risen than the thin, crêpe-like British Pancakes traditionally made across the UK on Shrove Tuesday, but generally not as thick or cakey as American-style pancakes. And although they share some similarities with Scottish Crumpets, the two are different bakes – Scottish Crumpets are larger and more spongy, with a distinctive bubbly, holey surface.
Drop Scones are usually made with self-raising flour, giving them their light, fluffy texture, and are traditionally served warm with butter, jam or other simple toppings. They also make a great breakfast option for Pancake Day (Shrove Tuesday).
Girdle or Griddle?
In Scotland, you’ll often see girdle used where recipes elsewhere might say griddle. A traditional Scottish girdle is a flat, circular iron plate used over the fire for cooking things like Old-fashioned Scones, Scottish Oatcakes and English Pancakes. The word has been used in Scots for centuries, and “girdle scone” is even recorded as a traditional Scots term. These days, a flat griddle pan or ordinary frying pan will do the same job for your Drop Scones.
My Family’s Drop Scone Recipe
If there’s one type of baking I feel I’ve mastered over the years, it’s pancakes! I’ve even joked about writing an entire recipe book dedicated to them – and it all started with these little beauties.
I’ve been making Drop Scones since my childhood – alongside my Golden Syrup Chocolate Chip Cookies and Mars Bar Cake – with my Mum on hand to help me perfect them. They’re still one of my favourite things to make for breakfast, especially eaten warm from the girdle with a drizzle of golden syrup or a spreading of butter melting on top 🤤 And my own kids love them now too – whether it’s at breakfast or as a wee snack with fruit, yoghurt or lashings of jam.
They’re also one of those recipes I’ll often make in a bigger batch. Drop Scones freeze brilliantly, and a minute or so in the toaster is usually all they need to bring them back to life. My Mum’s trick (passed on to her from her own Granny) of adding a little oil directly to the batter also helps them stay softer for longer, rather than quickly drying out – something I still do every time I make them!

Key Ingredients
See the recipe card for a full ingredients list, required quantities and cup conversions.
Substitutions & Additions
Self-raising Flour: If you don’t have self-raising flour, you can make your own using plain flour and baking powder. For the 220g self-raising flour in this recipe, use 220g plain flour with 3 tsp baking powder. You can find more information in my Self-raising Flour Ingredient Guide.
Milk: Dairy milk works well, as do many non-dairy milk alternatives. The most important thing is the consistency of the finished batter – it should be thick and spoonable, rather than thin and runny.
Additions: I sometimes add blueberries or chocolate chips to the batter when the kids request them. Blueberries are especially lovely for breakfast, while chocolate chips make them a little more of a treat. Both work well, as do raisins and sultanas, without needing to change the basic method.
Looking for dairy-free, gluten-free or vegan adaptations? See the Free-from & Vegan section below.
Free-from & Vegan
Gluten-free Options:
A gluten-free self-raising flour can be used as a straight swap for the wheat self-raising flour. Gluten-free flour can sometimes absorb a little more liquid, so if the batter feels too thick, add an extra splash of milk until you reach the usual thick, spoonable consistency.
Nut-free Adjustments:
This recipe contains no nuts, but as always, be sure to double-check the allergen lists for your individual ingredients.
Dairy-free Swaps:
Use your favourite dairy-free milk alternative in place of dairy milk. The recipe is otherwise naturally dairy-free, provided you use oil rather than butter for greasing the girdle or frying pan.
Egg-Free Adaptations:
I have tested these Drop Scones using both applesauce and mashed banana in place of the eggs, and both work well, but bear in mind that banana will add a little flavour of its own, while applesauce is the more neutral of the two. Shop-bought vegan egg replacer, such as Oggs or Bob’s Red Mill Egg Replacer, should also work, although I haven’t personally tested them in this recipe yet – if you do, I’d love to hear how you get on!
Vegan Substitutions:
To make these Drop Scones vegan, use a dairy-free milk alternative and replace the eggs as above. Applesauce or mashed banana are both options I’ve tested, while a shop-bought egg replacer may also work.
Allergy Disclaimer & Resources:
Any advice or suggestions to make recipes “free-from” or vegan are purely suggestions. Please double-check all packaged ingredients individually, taking extra caution when baking for those with allergies or intolerances.
For official guidance on food allergies, please see Food Standards Agency (food.gov.uk) | For more info on coeliac disease, please see Coeliac UK (coeliac.org.uk) | For more info on a vegan diet, please see The Vegan Society (vegansociety.com)
How to Make Drop Scones
Drop Scones are very quick to make, but getting the batter consistency and heat of your girdle right makes all the difference.
- Mix the dry ingredients. Add the self-raising flour and caster sugar to a large bowl and mix together.
- Combine the wet ingredients. In a separate jug or bowl, whisk together the eggs, milk and oil.
- Make the batter. Gradually add the wet ingredients to the flour mixture, whisking as you go, until you have a smooth, thick batter. It should drop easily from a spoon but shouldn’t be so runny that it immediately spreads across the girdle.
- Heat the girdle. Place your girdle or frying pan over a medium heat and lightly grease it with a little oil. Give it a few minutes to heat properly before adding the batter.
- Cook the first side. Drop about 2 tablespoons of batter per Drop Scone onto the hot girdle, leaving a little space between each one. Cook until lots of little bubbles begin appearing on the surface and the top starts to look as if it is drying out.
- Flip and finish cooking. Turn each Drop Scone and cook the other side until golden. Continue with the remaining batter, adjusting the heat and lightly greasing the girdle again if needed.
Top Tips for Perfect Drop Scones
- Get the Girdle Temperature Right: Medium heat is usually best. If it’s too hot, the outside will brown before the middle has had time to cook. Too cool, and the Drop Scones can spread rather than puffing up nicely.
- Look for the Bubbles: Don’t rush the flip! Wait until lots of little bubbles have appeared across the surface and the top is starting to look a little drier.
- Watch the Batter Consistency: You want a thick, spoonable batter that drops easily from the spoon but doesn’t immediately spread across the girdle. If it looks very runny, your Drop Scones will end up flatter and thinner.
- Use Around 2 Tablespoons per Drop Scone: This gives you nice, even-sized pancakes and makes it easier to judge the cooking time from batch to batch.
- The Oil Trick: Don’t skip the spoonful of oil in the batter. My family has always added it to help keep the Drop Scones soft, especially useful if you’re making a larger batch to eat later or freeze.
- Use the First One as a Tester: Where are my Gilmore Girl fans at?? The first pancake will tell you whether the girdle is hot enough, too hot, and whether the batter is spreading exactly as it should. You can then adjust the heat before cooking the rest.
Storage, Freezing & Reheating
- Storage: Once completely cool, keep your Drop Scones in an airtight container at room temperature. They’re at their best when fresh, but will keep well for a few days.
- Freezing: Drop Scones freeze really well, which is why I often make a bigger batch. Once completely cool, freeze them in an airtight container or freezer bag, separating the layers with a little baking paper if needed to stop them sticking together.
- Reheating: My favourite way to bring frozen Drop Scones back to life is to pop them straight into the toaster for a minute or so. You can also gently warm them in a toaster or under the grill until heated through, then serve with butter, jam, syrup, or whatever you fancy.
Drop Scones FAQs
Yes. Drop Scones and Scotch Pancakes are two names for the same type of small Scottish pancake. You may also see them called Scottish Pancakes. They’re thicker and fluffier than traditional thin British pancakes, but generally not as thick or cakey as American-style pancakes.
Both names are used. Drop Scones is probably the name you’ll see most often in modern recipes, but Dropped Scones is also a traditional name and is still what some families call them. The name comes from the way spoonfuls of batter are dropped onto a hot girdle or frying pan to cook.
The batter should be thick and spoonable, dropping easily from the spoon without immediately spreading across the girdle. If yours seems too thin, add a little extra self-raising flour, a spoonful at a time, until you reach the right consistency. Different flours – and even different egg sizes – can mean you need slightly more or less milk, so the overall consistency is more important than forcing in every last drop if you don’t feel you need it.
There are a few things that can affect the rise. Make sure your self-raising flour is still fresh, avoid overmixing the batter once everything has come together, and check that your girdle or frying pan is properly heated up before you start cooking your pancakes. A batter that is too thin can also spread too much, leaving you with flatter Drop Scones.
Watch the surface rather than relying entirely on time. Little bubbles should begin appearing across the top, and the surface should start to look a little drier, with the edges beginning to set. That’s your cue to flip! The underside should be nicely golden, then the second side will cook a little more quickly. If your pancakes are browner than you’d like, reduce the temperature a little for the next one.
More Classic Scottish Bakes
If you loved these Drop Scones, here are some more of my favourite Scottish baking recipes for you to try next:
Save this recipe!
Want to save this recipe for later? Pop your email below and come back to it when you’re ready to bake.
Drop Scones (Scotch Pancakes)
INGREDIENTS
- 220 g Self-raising Flour (see Self-raising Flour note below)
- pinch of Salt
- 50 g Caster Sugar
- 2 Free-range Eggs (at room temperature; see Egg Size note below)
- 280 ml Milk
- 1 tbsp Sunflower or Vegetable Oil (plus extra for greasing)
EQUIPMENT
- Girdle Pan (griddle or frying pan)
INSTRUCTIONS
- In a large bowl, sift the flour and salt, then add the sugar and gently stir to combine.
- In a separate bowl or jug, whisk the milk & eggs together with a fork, then gradually add them to the dry ingredients while whisking together. Once combined and you have a batter, add the oil and mix through until just combined.
- Grease your girdle (griddle) pan or frying pan with a little oil and warm over a low-medium heat. Once hot, spoon small amounts of the batter (around 2 tablespoons per pancake) onto the girdle, leaving a little space between each to allow them to spread.
- Allow your pancakes to cook – you will know they are ready to flip once small bubbles form on top and begin to pop, and they appear a little drier with firm edges. Using a spatula, flip the pancakes and cook the other side for a couple of minutes or until golden brown.
- Remove from the heat, allow to cool on a wire cooling rack a little before serving with your toppings of choice.
IMPORTANT NOTE:
All my recipes are developed using a digital scale and the metric system (grams and millilitres). Cup measurements are available as a conversion, but these, unfortunately, won’t always be as accurate. For best results, I always recommend baking with a digital scale.
RECIPE NOTES:
LIKE THIS RECIPE?
Leave a comment and rating below!Originally published February 2016.