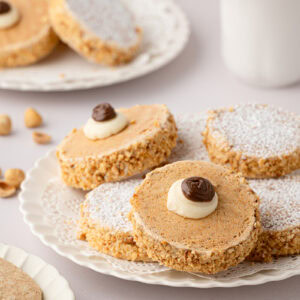
Japonaise (Japs)
Scottish Japonaise cakes (or "Japs") are a traditional bakery favourite made from crisp hazelnut meringue biscuits sandwiched together with buttercream, rolled in ground hazelnuts and finished with a dusting of icing sugar.
PRINT RECIPE
Servings: 9
INGREDIENTS
For the Meringue Biscuits:
- 3 Free-range Egg Whites (see notes below)
- 130 g Caster Sugar (Superfine Sugar)
- 20 g Cornflour (Corn Starch)
- 100 g Ground Roasted Hazelnuts (see notes below)
For the Filling & Decoration:
- 100 g Block Margarine or Butter (softened)
- 200 g Icing Sugar (Powdered Sugar) (plus extra for dusting)
- 50 g Ground Roasted Hazelnuts
- Nutella (optional)
EQUIPMENT
- Electric Hand Mixer (or a stand mixer, or a whisk)
INSTRUCTIONS
- Preheat your oven to 150°c (130°c for fan-assisted ovens, Gas Mark 2 or 300°F). Line a couple of baking sheets with greaseproof paper and set aside.
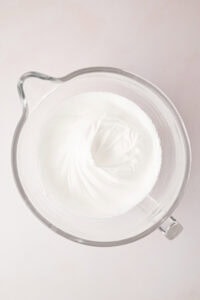
- In a large, very clean bowl, whisk the egg whites until you reach soft peaks (soft, foamy, holds its shape but still falls a little when the whisk is lifted). Use an electric hand mixer or stand mixer if possible - this can be done by hand, but it takes a bit of time and effort.
- Continue whisking while adding the sugar a spoonful at a time, ensuring each spoonful is mixed in before adding the next. As you add the sugar, you should see the mixture start to thicken and become a glossy white. Continue mixing until all the sugar is added and the mixture reaches stiff peaks (be patient; this can take time).
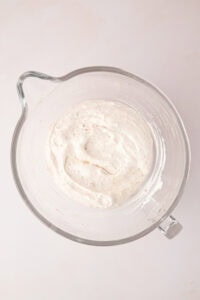
- In a separate small bowl, stir cornflour through the hazelnuts before adding to the meringue mixture, and gently fold through until all nuts are incorporated. Be careful not to overmix - gently fold until just combined.
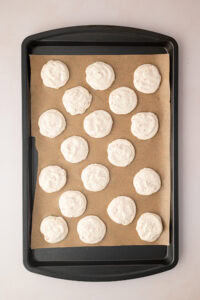
- Pipe (or spoon) the nutty meringue mixture onto your pre-lined baking sheets in even circles approximately 6cm (2-inches) in diameter and 1cm (approx ½-inch) in height. Try to keep them relatively even and flat - more like discs, rather than domed in the middle. If you do have peaks or domes, use a wet finger to gently tap the tops to flatten.
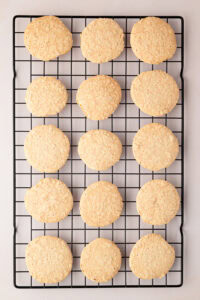
- Bake in your preheated oven for around 25 to 30 minutes, until they appear dry on top, are firm to the touch and have a slight golden hue.
- Allow the Jap biscuits to cool for a few minutes, then carefully peel off the paper while still warm, & allow to fully cool completely.
- While the Jap biscuits cool, prepare the buttercream for filling & decorating by creaming the butter and icing sugar together until light and fluffy.
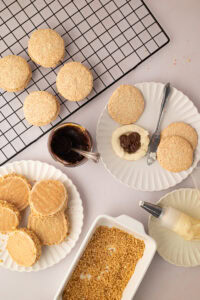
- Pipe or spoon a small amount of buttercream onto the top of one of your biscuits, then sandwich it with the top side of a second biscuit (you want the flat edges on the outside and the slightly convex surface inside, with the buttercream). Repeat with the rest of the biscuits.
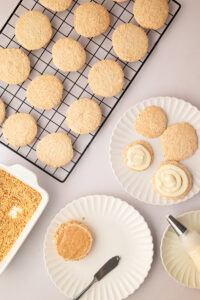
- Next, take your constructed biscuits and smooth the buttercream around the sides before rolling them in ground hazelnuts. Finish with a dusting of icing sugar on the tops. You can also top with some drizzle of chocolate, a dollop of buttercream & chocolate, piped Nutella…
If you want neat, uniform Japs, you can draw circles on the underside of your paper to use as a guide; around a 6cm (2-inch) diameter is ideal, and be sure to leave a few centimetres of space between each circle.
You should get 16-20 (so 8-10 finished Japs), depending on the size of your discs.
IMPORTANT NOTE:
All my recipes are developed using a digital scale and the metric system (grams and millilitres). Cup measurements are available as a conversion but these, unfortunately, won't always be as accurate. For best results, I always recommend baking with a digital scale.
NOTES
Egg Size:
When it comes to eggs, I always buy the Mixed-weight Free-range Eggs. Generally speaking, egg size doesn’t make a huge difference in most baking, unless you are using sizes that lean into the extremes. But with that in mind, medium-sized eggs are probably the best option if you are unsure what size eggs to use.Storage:
Store Japonaise cakes in an airtight container at room temperature for up to 3 days. If your kitchen is particularly warm, you can store them in the fridge, but allow them to return to room temperature before serving for the best texture.Substitutions:
- Ground Roasted Hazelnuts: For the best flavour, I recommend using ground roasted hazelnuts. I buy mine from Amazon, but you can make your own by lightly toasting regular ground hazelnuts in the oven at 170°c (150°c fan-assisted ovens, Gas Mark 3 or 325°F) for 5-10 minutes, stirring occasionally and watching carefully to prevent them from burning. Allow them to cool completely before using. Regular ground (unroasted) hazelnuts will still work perfectly well, but the roasted nuts add a deeper, nuttier flavour to the finished Japonaise cakes. Alternatively, you can use ground almonds if you prefer that flavour, or a combination of almonds and hazelnuts.
- Egg Whites: In theory, you could use powdered egg whites to make Scottish Japs, but I haven't tested this, so I can't comment on how successful they would be.
Yield Note:
Depending on the size you pipe your meringue discs, this recipe will make approximately 8-10 filled Japonaise cakes.Tried this recipe?
Tag @bakingwithgranny or use the hashtag #bakingwithgranny!